Traditional Fry Bread Recipe: A Crispy, Golden and Authentic Homemade Delight
There is something deeply comforting about the smell of dough hitting hot oil in my kitchen. It reminds me of family gatherings where laughter filled the air and the table was always full. I remember watching my grandmother work the dough with such ease, creating a warm, inviting snack that brought everyone together.
Thank you for reading this post, don't forget to subscribe!Today, I want to share that same joy with you. By following this traditional fry bread recipe, you can master the art of making a perfect, pillowy treat right at home. It is a simple process that turns basic pantry staples into a golden, crispy masterpiece.
Creating your own homemade fry bread is a rewarding experience that connects you to a rich culinary history. Whether you serve it with honey or savory toppings, this dish is sure to become a favorite for your loved ones. Let’s get started on this delicious journey together.
Table of Contents
The Cultural Significance and History of Fry Bread
When I look at a piece of golden, crispy dough, I see more than just a snack; I see a profound piece of American history. This dish carries a weight that goes far beyond its simple ingredients, representing a story of resilience and adaptation. Understanding the roots of native american fry bread allows us to appreciate the deep connection between food and the human spirit.

Understanding the Origins of Native American Fry Bread
The true fry bread history is rooted in a period of great hardship during the 1860s. When the Navajo people were forced to relocate during the Long Walk, they faced extreme food scarcity. The government provided rations consisting of white flour, sugar, and lard, which were foreign to their traditional diet.
Out of necessity, they combined these basic ingredients to create a new, sustaining food source. This act of creativity under pressure birthed a recipe that would eventually become a cultural icon. It serves as a powerful reminder of how communities can transform limited resources into something meaningful.
Why This Dish Remains a Staple in Modern Households
Today, this food is much more than a historical artifact; it is a vibrant part of contemporary life. You will frequently find it served at local fairs and community Pow Wow events across the United States. It acts as a bridge between past traditions and current family gatherings.
For many, it is the ultimate comfort food that brings people together. Whether it is enjoyed at a large celebration or prepared in a home kitchen, it continues to honor the enduring legacy of those who first created it. By keeping this tradition alive, we celebrate a history of survival and the joy of sharing a meal with loved ones.
Essential Ingredients for an Authentic Fry Bread Recipe
You only need five basic ingredients to create a delicious, authentic fry bread recipe at home. By focusing on pantry staples like flour, baking powder, salt, milk, and oil, you can easily master the foundation of this classic dish.
The Importance of High-Quality Flour
The flour you select serves as the structural backbone of your dough. I always recommend using a high-quality all-purpose flour to ensure the right balance of protein. Too much protein can make the bread tough, while too little might prevent it from holding its shape during the frying process.
When you gather your fry bread ingredients, look for a brand that is consistent in texture. A reliable flour allows the dough to become soft and pliable, which is essential for that signature airy interior. Proper flour choice is the first step toward a successful traditional fry bread recipe.
Choosing the Right Leavening Agents
Baking powder is the magic component that gives your bread its iconic puffiness. If your baking powder is old or expired, your dough will likely turn out flat and dense. Always check the expiration date to ensure your fry bread ingredients are fresh and active.
Using the correct amount of leavening ensures that the dough rises beautifully when it hits the hot oil. This creates the light, golden pockets that make an authentic fry bread recipe so satisfying to eat. I find that testing the freshness of your baking powder before mixing is a simple habit that guarantees better results every time.
| Ingredient | Primary Role | Pro-Tip |
|---|---|---|
| All-Purpose Flour | Provides structure | Sift for lighter texture |
| Baking Powder | Creates lift and puff | Ensure it is not expired |
| Salt | Enhances flavor | Use fine sea salt |
| Milk | Adds richness | Use warm for better activation |
Selecting the Right Equipment for Perfect Frying
I have learned that the secret to consistent, golden fry bread often hides in the equipment you choose. While many people reach for a standard skillet, I find that the right vessel changes the entire experience. Investing in quality tools not only makes the process easier but also keeps your kitchen much cleaner.
Choosing the Best Pot for Even Heat Distribution
When I prepare fry bread, I prefer using a deep pot or a heavy-bottomed kettle. These are significantly less messy than a traditional cast-iron skillet because the high walls effectively contain oil splatter. A deep pot also helps maintain a more stable oil temperature, which is crucial for achieving that perfect, airy texture.
Cast-iron skillets are popular, but they often lead to uneven heat spots if not managed carefully. By using a deep pot, you ensure the oil surrounds the dough evenly. This simple switch prevents the frustration of burnt edges and raw centers.
| Equipment Type | Heat Control | Splatter Risk | Best Use |
|---|---|---|---|
| Deep Pot | Excellent | Low | Deep Frying |
| Cast-Iron Skillet | Moderate | High | Shallow Frying |
| Dutch Oven | Superior | Low | Batch Frying |
Tools for Safe Handling and Flipping
Safety is my top priority when working with hot oil. I always keep a pair of long-handled stainless steel tongs nearby to flip the dough without getting my hands too close to the heat. These tools provide the precision needed to handle delicate dough without tearing it.
“Cooking is at once child’s play and adult joy. And cooking done with care is an act of love.”
In addition to tongs, a sturdy slotted spoon is essential for removing the finished bread from the oil. This allows excess oil to drain back into the pot, ensuring your final result is light rather than greasy. Always ensure your tools are completely dry before they touch the oil to prevent dangerous popping.
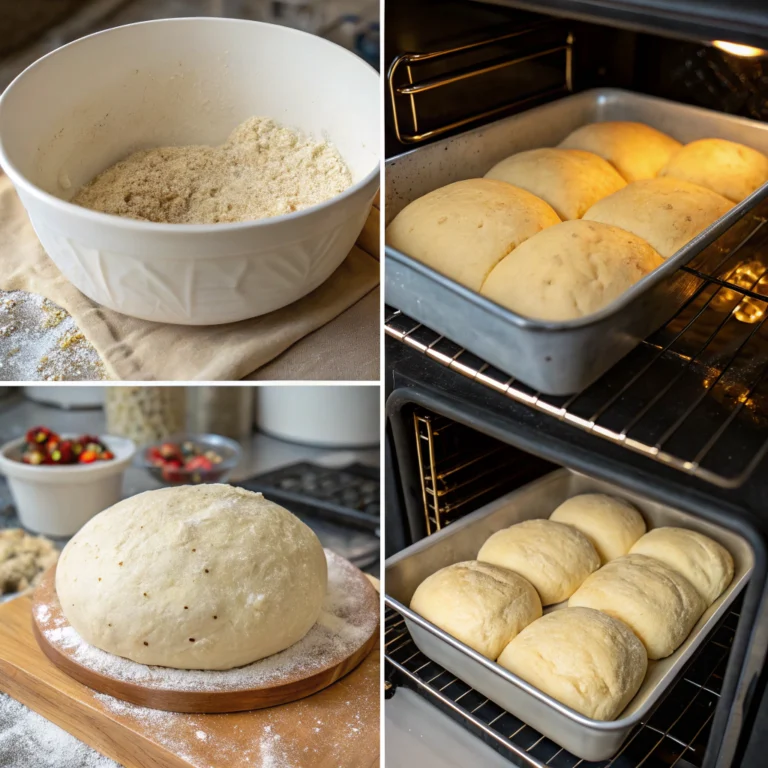
Preparing Your Dough for Optimal Texture
I have found that the secret to a perfect, golden result lies entirely in how you mix and rest your dough. Achieving the right consistency is the most important step in any easy fry bread recipe, as it determines whether your final product will be light and airy or dense and chewy.
Mixing Techniques for a Soft, Pliable Dough
When I prepare my dough, I focus on gentle handling to ensure the gluten does not overdevelop. If you mix the ingredients too vigorously, the bread will become tough rather than soft and pliable.
I recommend using a light touch when incorporating your flour and liquid. Simply fold the ingredients together until a shaggy ball forms, then knead it just enough to bring everything into a smooth, cohesive mass. This simple approach is the hallmark of a truly easy fry bread recipe that yields professional results.
The Importance of Resting the Dough
Many home cooks make the mistake of rushing the process, but patience is your best friend here. I always let my dough rest for at least 30 minutes before I attempt to shape it.
This resting period allows the gluten to relax, which makes the dough much easier to stretch without it snapping back. Furthermore, it prevents the dough from being too sticky, ensuring you can handle it with ease. A well-rested dough is the foundation of a successful easy fry bread recipe.
| Dough Issue | Likely Cause | Recommended Fix |
|---|---|---|
| Too Sticky | Insufficient resting time | Let rest for 30 minutes |
| Too Tough | Over-kneading | Use a lighter touch |
| Doesn’t Stretch | Gluten is too tight | Add more resting time |
Step-by-Step Guide to Shaping the Dough
Learning how to make fry bread requires a gentle touch when it comes to the final shaping process. This stage is where your dough transforms from a simple ball into the iconic, golden discs you crave. By following these steps, you ensure that every piece cooks evenly and looks beautiful.
Dividing the Dough into Equal Portions
Start by turning your rested dough onto a lightly floured surface. Use a sharp knife or a bench scraper to divide the mass into equal, palm-sized portions. Consistency is key here, as uniform sizes ensure that all your bread finishes frying at the same time.
Techniques for Stretching the Dough by Hand
Pick up a portion of dough and gently pat it into a small, thick circle. Using your fingertips, carefully stretch the edges outward while rotating the dough in your hands. Allow gravity to assist you, letting the weight of the dough pull it into a thin, rustic shape.
Avoiding Overworking the Gluten
It is vital to handle the dough with light, deliberate movements. If you pull or knead the dough too aggressively at this stage, you will overwork the gluten. This results in a tough, chewy texture rather than the light, airy bite you want when learning how to make fry bread.
Achieving the Signature Center Hole
Once your disc is stretched to your desired thickness, use your thumb to poke a small hole in the very center. This simple trick is a game-changer for your final result. The hole allows steam to escape, which helps the bread stay flat and prevents it from puffing up into an uneven ball during the frying process.
Mastering the Frying Process for a Golden Finish
When I prepare an authentic fry bread recipe, the frying stage is where the real transformation occurs. This is the moment your soft dough turns into a crispy, golden delight that everyone craves. Achieving this result requires patience and a watchful eye over your cooking environment.
Maintaining the Ideal Oil Temperature
The secret to success lies in keeping your oil at a steady 350°F. If the oil is too cool, the dough will soak up the fat and become greasy. If it is too hot, the outside will burn before the center is fully cooked.
I personally use a simple popcorn kernel test to check if the oil is ready. Simply drop a single kernel into the pot; if it pops, your oil has reached the perfect temperature for frying. This reliable method ensures your authentic fry bread recipe stays consistent every time you cook.
Monitoring the Color and Crispness
Once the dough hits the oil, it will puff up almost immediately. I keep a close watch on the color, aiming for a beautiful, deep golden brown on both sides. You should flip the bread carefully using long-handled tongs to ensure even browning.
Do not crowd the pot, as this can cause the temperature to drop rapidly. Focus on one or two pieces at a time to maintain control over the texture. This careful attention guarantees that signature crunch that makes this dish so special.
Draining Excess Oil for a Light Result
After removing the bread from the oil, the final step is crucial for a light finish. I always place the finished pieces on a wire rack or a plate lined with paper towels. This simple action helps remove any excess oil from the surface.
Allowing the bread to rest for a minute also helps the steam escape, which keeps the crust crisp. Following these steps will help you master an authentic fry bread recipe that is never heavy or oily.
| Step | Action | Goal |
|---|---|---|
| Temperature Check | Use a thermometer or kernel | Reach 350°F |
| Frying | Fry until golden brown | Perfect crispness |
| Draining | Use paper towels | Remove excess oil |
Troubleshooting Common Fry Bread Challenges
Even when you follow an easy fry bread recipe, you might run into a few bumps in the road. It is completely normal to encounter minor hurdles while learning to perfect this classic dish. With a little bit of patience and the right techniques, you can overcome these common kitchen obstacles.
Why Your Dough Might Be Too Tough
If your finished bread feels dense or chewy rather than light and airy, the culprit is often over-handling. Many beginners make the mistake of kneading the dough for too long, which develops too much gluten. I recommend kneading your dough only four or five times to keep it tender.
“The secret to a perfect texture lies in the gentleness of your touch; treat the dough like a delicate cloud rather than a heavy weight.”
Fixing Issues with Uneven Browning
Uneven color often happens when the oil temperature fluctuates or the pot is too crowded. If you notice some spots are dark while others remain pale, try these simple adjustments:
- Use a heavy-bottomed pot to ensure consistent heat distribution.
- Avoid overcrowding the pan, as this drops the oil temperature too quickly.
- Check your oil with a thermometer to maintain a steady heat level throughout the process.
Adjusting for Humidity and Altitude
Environmental factors play a significant role in how your dough behaves. If you live in a high-altitude area or a very humid climate, you may need to tweak your easy fry bread recipe slightly. High humidity often requires a little extra flour to prevent the dough from becoming sticky.
Conversely, if you are at a high altitude, your dough might rise faster or dry out more quickly. Keep a small bowl of extra flour and water nearby so you can adjust the consistency until the dough feels soft and pliable. Adapting to your specific environment is the hallmark of a true home cook.
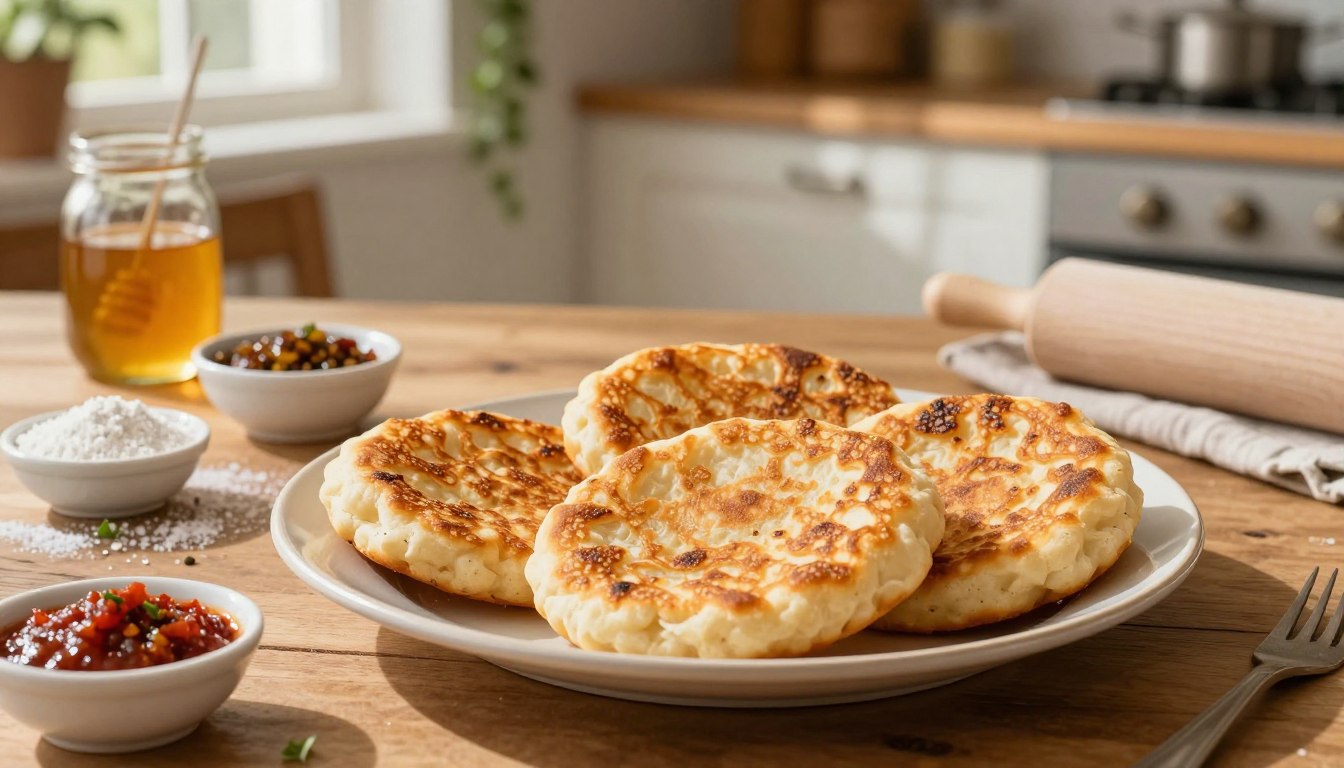
Creative Ways to Serve and Enjoy Your Homemade Fry Bread
Bringing your warm, crispy bread to the table opens up a world of culinary possibilities. Once you master the art of making homemade fry bread, you will find that it serves as the perfect canvas for both sweet and savory toppings. Whether you are hosting a brunch or preparing a quick family dinner, this versatile dough is sure to impress.
Classic Sweet Toppings: Honey and Powdered Sugar
For a simple yet delightful treat, many people prefer the traditional sweet route. A generous drizzle of warm honey over your homemade fry bread creates a sticky, golden glaze that is hard to resist. You can also dust the surface with a light coating of powdered sugar for a beautiful, snowy finish that balances the savory notes of the fried dough.
Savory Applications: Making Indian Tacos
If you are looking for a heartier option, transforming your dough into Navajo Tacos is a fantastic choice. I love to pile mine high with a base of seasoned chili, followed by crisp shredded lettuce, sharp cheddar cheese, and diced tomatoes. This savory application turns a simple piece of homemade fry bread into a substantial, satisfying meal that everyone will enjoy.
Pairing Suggestions for a Complete Meal
To round out your dining experience, consider pairing your creation with complementary side dishes. A fresh, zesty coleslaw or a side of roasted corn salad provides a nice crunch that contrasts well with the soft, airy texture of the bread. By serving your homemade fry bread alongside these fresh ingredients, you create a balanced and memorable feast for your friends and family.
Traditional Navajo Fry Bread Variations and Regional Twists
I love how versatile this recipe is, offering endless opportunities for creative kitchen experimentation. While the classic version is a staple, exploring different regional styles allows you to tailor the final result to your specific taste preferences. These small adjustments honor the history of native american fry bread while letting you discover new textures in your own home.
Incorporating Whole Wheat Flour
If you want to add a nutty depth to your dough, try swapping a portion of the all-purpose flour for whole wheat. I recommend starting with a ratio of one part whole wheat to three parts white flour to maintain the signature lightness. This simple change provides a heartier bite that pairs beautifully with savory toppings.
Using whole wheat flour is a fantastic way to introduce more fiber into your meal without sacrificing the authentic experience. You will find that the dough remains quite pliable, though it may require a slightly longer resting period to hydrate the bran properly. This variation is a popular choice for those who enjoy a more rustic, earthy flavor in their traditional navajo fry bread.
Adding Dairy for a Richer Flavor Profile
Another way to transform your dough is by incorporating dairy, such as buttermilk or whole milk, instead of water. This technique creates a decadent, tender crumb that melts in your mouth. Many home cooks prefer this method when they want a richer flavor profile for their native american fry bread.
The lactic acid in buttermilk also helps to tenderize the gluten, resulting in a softer texture that stays fresh for longer. When you use dairy, keep a close eye on your oil temperature, as the extra sugars can cause the bread to brown more quickly. Mastering these regional twists on traditional navajo fry bread will surely impress your family and friends at your next gathering.
Safety Tips for Deep Frying at Home
I believe that mastering the art of frying starts with understanding how to handle hot oil with confidence. While preparing traditional navajo fry bread is a rewarding experience, the high temperatures involved require your full attention. By following a few simple protocols, you can ensure that your kitchen remains a secure environment for everyone.
Managing Hot Oil Safely
The most critical rule when working with hot oil is to maintain control over your movements. When you are ready to cook, always place the dough into the oil by laying it away from you. This simple motion prevents hot oil from splashing back toward your hands and arms.
“Safety is not just a precaution; it is the most important ingredient in any successful kitchen endeavor.”
Preventing Splatter and Burns
Splatter often occurs when moisture meets hot oil, so keeping your workspace dry is essential. I recommend using long-handled tongs or a spider strainer to keep your hands at a safe distance from the heat. Consider these additional tips to keep your cooking area safe:
- Pat your dough dry if it feels overly damp before frying.
- Never overfill your pot, as the oil level will rise when you add the dough.
- Keep a lid nearby to smother potential flare-ups, but never use water on an oil fire.
Proper Disposal of Used Frying Oil
Once you have finished making your traditional navajo fry bread, you must handle the leftover oil with care. Never pour hot oil directly into your sink, as it can solidify and cause significant plumbing issues. Instead, follow these steps for responsible disposal:
- Allow the oil to cool completely to room temperature.
- Strain the oil through a fine-mesh sieve to remove any food particles.
- Pour the cooled oil into a sealable container and place it in your regular trash bin.
Conclusion
Mastering this recipe is a rewarding experience that brings a piece of cultural tradition into your home. Learning how to make fry bread connects you to a rich history while providing a delicious meal for your family.
You now possess the skills to create a crispy, golden treat that works for any occasion. I encourage you to experiment with different toppings and share these warm, pillowy circles with your friends.
Understanding how to make fry bread is about more than just following steps. It is about creating memories around the table with the people you care about most. I hope you enjoy the process of perfecting your technique and serving this authentic dish.
Do you have a favorite way to serve your bread? I would love to hear about your kitchen adventures and the unique twists you bring to this classic recipe.