Classic Italian Focaccia Bread Recipe: Simple, Rustic & Delicious
There is something truly magical about the smell of warm dough wafting through your home. I remember the first time I pulled a golden, dimpled loaf from my oven; the crunch of the crust and the soft, airy center felt like a warm hug. It is my absolute joy to share this easy focaccia recipe with you today.
Thank you for reading this post, don't forget to subscribe!I updated this guide in May 2025 to ensure your success with clearer steps and helpful tweaks. Whether you are a beginner or a seasoned baker, this rustic focaccia bread is designed to be a simple, approachable project. You will find that this classic focaccia bread delivers bakery-quality results with minimal hands-on effort.
Mastering a traditional focaccia bread recipe does not have to be intimidating. Let’s get started on creating something delicious together.
Table of Contents
The Art of Authentic Italian Focaccia
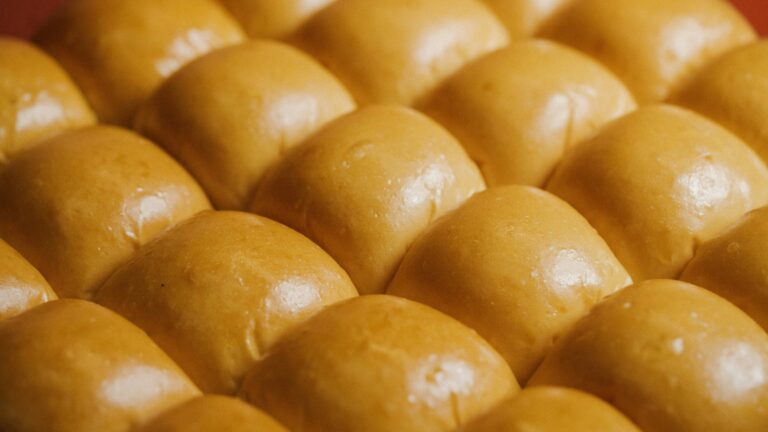
When I think of the perfect loaf, my mind immediately drifts to the golden, dimpled surface of a homemade focaccia. This classic Italian square bread is famous for its signature olive oil-soaked crust and a tender, airy interior that practically melts in your mouth.

The most celebrated variety, known as Focaccia alla Genovese, traces its roots back to Genoa in the beautiful Liguria region of Italy. Traditionally, this authentic italian focaccia is enjoyed plain or lightly topped with fresh herbs, allowing the quality of the ingredients to shine through.
I find the process of creating a traditional italian focaccia to be incredibly satisfying. It is far superior to any store-bought version I have ever tasted, offering a depth of flavor that only time and patience can provide.
Understanding the history and characteristics of this rustic focaccia bread helps you truly appreciate the delicate balance of a crisp, golden exterior and a soft, fragrant crumb. Once you master these fundamentals, you will never want to go back to ordinary bread again.
Essential Ingredients for Your Traditional Focaccia Bread Recipe
When I bake at home, I focus on three core components that transform simple pantry items into a masterpiece. Using the right supplies is the foundation of any traditional focaccia bread recipe. By choosing quality, you ensure your kitchen smells like a professional bakery.

Selecting the Right Flour for Texture
The structure of your bread depends heavily on the protein content of your flour. I always prefer bread flour because it creates a much chewier and more resilient crumb than standard all-purpose flour. This extra protein builds the gluten network needed to hold those signature air pockets.
If you only have all-purpose flour on hand, do not worry. It will still produce a delicious result, though the texture might be slightly softer. For an authentic italian focaccia, bread flour remains my top recommendation for that professional finish.
The Importance of High-Quality Extra Virgin Olive Oil
Olive oil is not just a fat source in this dish; it is a primary flavor profile. I suggest using a cold-pressed, high-quality extra virgin olive oil to get the best results. This type of oil provides a grassy, fruity depth that elevates the entire loaf.
Never be shy with your oil usage during the process. It helps fry the bottom of the crust while keeping the interior moist and tender. A generous drizzle is the hallmark of a great recipe.
Yeast and Hydration Ratios
To achieve the perfect rise, I rely on instant yeast. It is specifically designed to work well with the slow, overnight fermentation process that develops deep flavor. Proper hydration is the secret to those beautiful, irregular air bubbles that define a traditional focaccia bread recipe.
The dough should feel quite sticky and wet before it hits the pan. This high water content is exactly what you need for an authentic italian focaccia with a light, airy interior. Use the following guide to understand how your ingredient choices impact the final bake:
| Ingredient | Role in Dough | Recommended Type |
|---|---|---|
| Bread Flour | Structure & Chew | High Protein (12%+) |
| Olive Oil | Flavor & Crispness | Cold-Pressed Extra Virgin |
| Yeast | Leavening & Rise | Instant Dry Yeast |
| Water | Hydration & Bubbles | Room Temperature |
Preparing Your Kitchen and Equipment
Before you begin mixing, let’s talk about the essential tools that make homemade focaccia a breeze. Having the right gear turns the entire process into a fun and efficient experience rather than a chore.
Choosing the Best Baking Pan
The secret to a perfect crust often lies in the pan you select. I find that a standard 13×9 metal pan works wonders for heat conduction.
If you want to take your baking to the next level, a dedicated Lloyd pan is a fantastic investment. These pans are designed to ensure the edges get perfectly crispy every single time.
Mixing Bowls and Proofing Containers
When you are ready to start the best focaccia recipe, your choice of mixing tool matters. I personally love using a Danish dough whisk for this task.
This tool is superior to a standard spoon because it handles sticky, high-hydration doughs with ease. To keep your workflow smooth, consider these tips for your containers:
- Always use a large enough bowl to allow for significant dough expansion.
- Keep your proofing containers clean to maintain a consistent environment.
- Ensure your containers have lids or covers to prevent the dough from drying out.
By organizing your space and selecting the right tools, you set yourself up for success. Preparing your equipment properly is a key step in mastering the best focaccia recipe for your homemade focaccia.
Step One: Mixing and Developing the Dough
You might be surprised at how little effort is needed to create a bakery-quality loaf at home. This easy focaccia recipe relies on patience rather than physical labor to produce a stunning result. By simply stirring your ingredients together, you set the stage for a delicious, airy bread that rivals any professional bakery.
Combining Ingredients for Optimal Gluten Development
To begin, combine your high-quality flour, salt, and instant yeast in a large mixing bowl. Slowly pour in your warm water while stirring with a sturdy spatula or wooden spoon. You are looking to create a shaggy, sticky dough that holds together but does not require any heavy lifting.
The goal here is to ensure all the flour is fully hydrated. Once the mixture looks uniform, cover the bowl tightly. This simple step ensures the gluten begins to form naturally without the need for traditional, tiring kneading techniques.
The No-Knead Method Explained
The beauty of this easy focaccia recipe is that it utilizes the no-knead method to do the hard work for you. Instead of manually working the dough, you allow time to act as your primary tool. By letting the mixture rest for 8 to 24 hours in the refrigerator, the yeast works slowly to develop complex flavors and a superior, airy crumb structure.
This long, cold fermentation is the secret to achieving that signature texture. You will notice the dough becomes smoother and more elastic on its own as the gluten strands align during the rest period. It is truly a hands-off approach that guarantees consistent, professional results every single time.
| Resting Time | Flavor Profile | Crumb Texture |
|---|---|---|
| 8 Hours | Mild and Yeasty | Soft and Dense |
| 16 Hours | Balanced and Tangy | Light and Airy |
| 24 Hours | Complex and Robust | Very Open and Bubbled |
Following this easy focaccia recipe allows you to enjoy the process of baking without the stress. Simply mix, wait, and prepare for the next stage of your culinary creation.
Step Two: The First Rise and Folding Techniques
Mastering the folding technique is the secret to achieving that signature airy crumb in your homemade bread. Once your dough has rested, you will notice it has become more elastic and filled with small, delicate bubbles. This stage is where the magic happens, as you gently guide the dough toward its final structure.
Why Folding Matters for Air Bubbles
Folding is essential because it builds gluten structure without deflating the precious gas pockets created by the yeast. By pulling the edges of the dough and folding them over the center, you strengthen the network of proteins that hold the bread together. This process ensures your loaf remains light and airy rather than dense.
If I find that my dough feels a bit slack or lacks the necessary tension, I rely on the slap-and-fold method. This technique provides extra strength quickly, ensuring the dough can hold its shape during the long fermentation. It is a gentle but effective way to handle the dough while keeping it hydrated and supple.
Monitoring the Dough Temperature
Your kitchen environment plays a massive role in how quickly your dough develops. A room temperature warmer than 72°F will cause the yeast to work rapidly, which might lead to an over-proofed loaf if you are not careful. Conversely, a cool kitchen can slow down the process significantly.
If your home feels a bit chilly, you can place the bowl in a slightly warmer spot, such as inside a preheated oven that has been turned off. This creates a consistent, cozy environment for the yeast to thrive. Keeping an eye on the clock and the feel of the dough will help you master the timing regardless of the season.
| Kitchen Condition | Estimated Rise Time | Recommended Action |
|---|---|---|
| Cool (Below 68°F) | 3 to 4 hours | Use a warm oven spot |
| Ideal (70°F – 72°F) | 2 to 2.5 hours | Keep on the counter |
| Warm (Above 75°F) | 1 to 1.5 hours | Monitor closely for bubbles |
Step Three: Transferring and Shaping in the Pan
Once the dough is ready, I carefully transfer it to the pan to begin the final shaping phase. This transition is essential for ensuring your bread develops the right structure before it hits the oven. By handling the dough gently, I preserve the delicate air bubbles created during the first rise.
Preparing the Pan with Olive Oil
Before I move the dough, I always make sure the pan is properly prepped. I start by greasing the pan generously with butter, which adds a wonderful flavor and helps the crust turn a deep, golden brown. Lining the bottom with parchment paper is my secret trick for an easy release and perfectly crispy edges.
Next, I pour a generous amount of high-quality olive oil into the center of the pan. This oil acts as a non-stick barrier and helps the dough slide into place without tearing. It also ensures that the bottom of the focaccia fries slightly during the bake, creating that signature crunch we all love.
Allowing the Dough to Relax and Spread
After placing the dough in the pan, I let it rest for 60 to 90 minutes. During this time, the gluten relaxes, allowing the dough to spread naturally toward the corners of the pan. I avoid forcing the dough into shape, as this can deflate the air pockets I worked so hard to build.
This resting period is crucial because it prepares the surface to hold the dimples I will add later. If the dough feels too tight, I simply give it a few more minutes to settle. Patience at this stage guarantees a light, airy crumb that defines a truly authentic loaf.
| Preparation Method | Benefit for Crust | Ease of Removal |
|---|---|---|
| Butter & Parchment | Extra crispy edges | Excellent |
| Olive Oil Only | Rich, golden flavor | Moderate |
| Non-stick Spray | Uniform browning | Good |
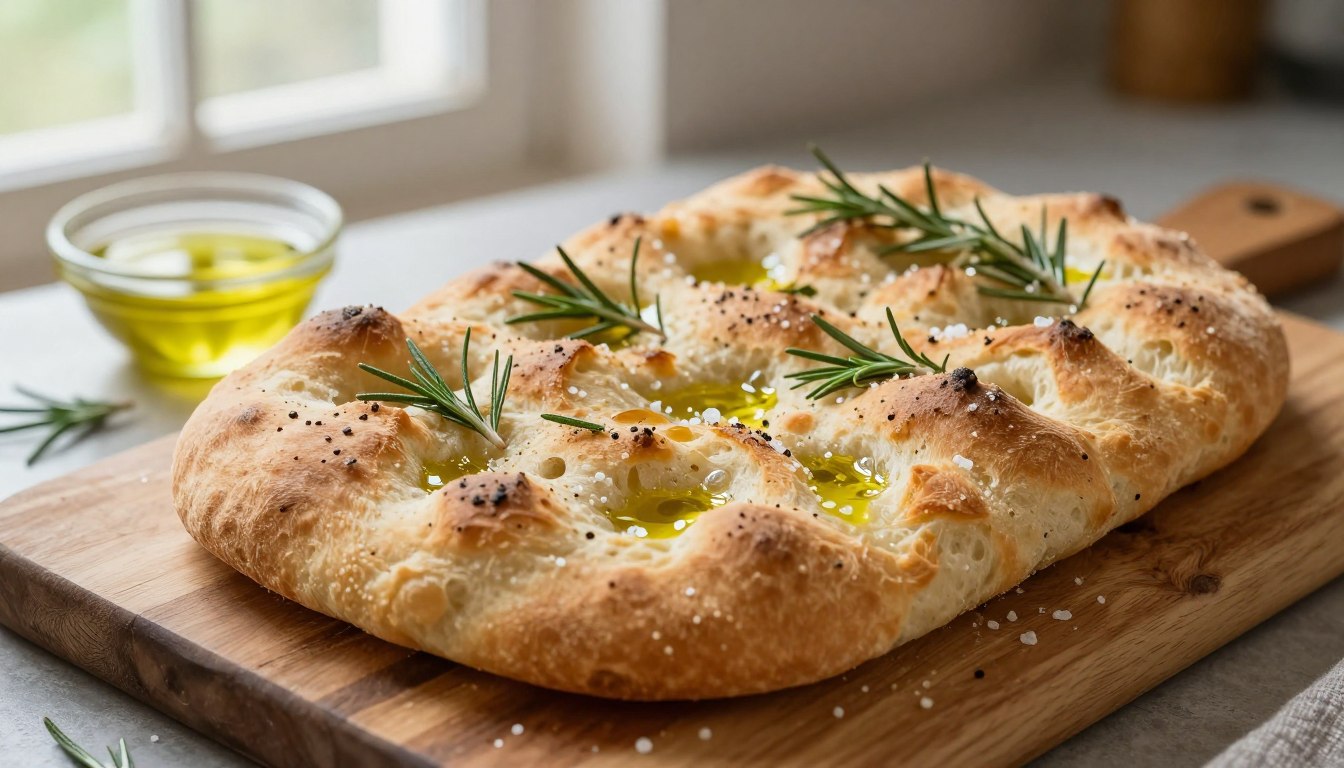
Step Four: Dimpling and Topping Your Focaccia
Now that your dough has rested, it is time to add the signature touch that defines a traditional italian focaccia. This stage is where the bread truly comes to life, transforming from a simple mass of dough into a beautiful, dimpled masterpiece.
The Signature Dimpling Technique
I find that using my fingertips to press deep dimples into the surface is the most satisfying part of the process. You should press firmly enough to reach the bottom of the pan, which creates those iconic pockets.
These indentations are not just for looks; they serve a vital purpose. They act as little wells that hold olive oil and seasonings, ensuring that every single bite is packed with flavor. When the oil pools in these spots, it helps create a crispy, golden bottom that is characteristic of a high-quality traditional italian focaccia.
Classic Toppings: Sea Salt, Rosemary, and Beyond
Once the dimples are set, it is time to get creative with your toppings. I always start with a generous drizzle of high-quality extra virgin olive oil and a sprinkle of flaky sea salt. These simple additions elevate the bread to a new level of culinary delight.
While rosemary is the classic choice, you can experiment with various ingredients to suit your mood. Whether you prefer savory herbs or fresh vegetables, the dough acts as a perfect canvas for your favorite flavors.
| Topping Combination | Flavor Profile | Best Serving Occasion |
|---|---|---|
| Rosemary & Sea Salt | Classic & Earthy | Everyday Side Dish |
| Cherry Tomatoes & Thyme | Sweet & Tangy | Summer Picnics |
| Garlic & Parmesan | Bold & Savory | Dinner Parties |
| Olives & Red Onion | Briny & Sharp | Appetizer Platters |
Remember that the key to a successful traditional italian focaccia is balance. Do not overload the surface, as you want the texture of the bread to remain the star of the show.
Step Five: Baking for the Perfect Golden Crust
The final stage of your baking journey is where the magic happens in the heat of the oven. This is the moment your hard work pays off, turning simple ingredients into the best focaccia recipe you have ever tasted. Proper heat management is the secret to success.
Oven Temperature and Placement
I always preheat my oven to a range between 425°F and 450°F. This high heat is essential to create a rapid rise in the dough, which gives the bread its signature airy texture. Placing your pan on the center rack ensures that the heat circulates evenly around the dough.
If you notice the top browning too quickly, you can loosely tent it with foil. However, keeping the pan centered usually prevents uneven spots. This consistent environment is vital for a beautiful, golden-brown finish.
Achieving the Ideal Crispy Exterior
To ensure a truly crispy focaccia, you must manage moisture after the bread leaves the oven. Steam is the enemy of a crunchy crust, so I immediately transfer the bread to a wire cooling rack. This allows air to flow underneath the loaf, preventing the bottom from becoming soggy.
The secret to a professional-grade crust is allowing the bread to breathe immediately after baking. Never leave it in the hot pan, as the trapped steam will soften your hard-earned crunch.
Follow these simple tips to maintain that perfect texture:
- Cooling: Always use a wire rack for at least ten minutes.
- Texture: A properly baked loaf should sound hollow when tapped on the bottom.
- Serving: Wait until the bread is slightly warm rather than piping hot for the best flavor profile.
Troubleshooting Common Focaccia Mistakes
Mastering the perfect loaf takes practice, and sometimes you need a little guidance to fix common errors. Even when you follow a recipe closely, environmental factors or small technique slips can affect your crispy focaccia. I have learned that most issues are easy to correct once you understand the science behind the dough.
Fixing Dense or Gummy Dough
If your dough feels sticky and difficult to handle, please resist the urge to add extra flour. Adding more flour will ruin the hydration levels and result in a heavy, dense crumb rather than an airy texture. Instead, use the slap-and-fold method to develop gluten strength without losing moisture.
If your bread turns out gummy or fails to rise, the culprit is often your yeast. Always ensure your yeast is fresh and active before you begin mixing. A healthy fermentation process is the secret to achieving that light, open structure we all love.
Adjusting for Humidity and Altitude
Your kitchen environment plays a significant role in how your dough behaves. High humidity can make the dough feel wetter than usual, while high altitude might cause it to rise too quickly. If you live in a humid climate, you may need to monitor your proofing time more closely to prevent over-proofing.
When baking at high altitudes, I suggest reducing the amount of yeast slightly to slow down the rise. This adjustment helps maintain the integrity of the dough, ensuring you still get a beautiful, crispy focaccia every time you bake.
| Common Issue | Likely Cause | Recommended Fix |
|---|---|---|
| Dense Crumb | Expired Yeast | Test yeast in warm water first |
| Sticky Dough | Over-handling | Use slap-and-fold technique |
| Pale Crust | Low Oven Temp | Increase heat by 25 degrees |
| Gummy Texture | Added extra flour | Maintain high hydration ratio |
Conclusion
Baking your own loaf at home turns a simple kitchen task into a rewarding culinary journey. You bring the authentic spirit of Italy into your own space with every batch you create.
My goal is to help you master the classic focaccia bread with ease. This reliable recipe serves as a foundation for your future kitchen experiments.
You will find that consistent practice leads to better results over time. Feel free to swap out toppings like rosemary for sun-dried tomatoes or olives to customize your classic focaccia bread.
I encourage you to share these golden, crispy slices with your friends and family. Nothing beats the joy of serving warm, fresh bread straight from your oven.
Keep your flour stocked and your olive oil ready for the next bake. I look forward to hearing about your success as you continue to refine your technique and enjoy every bite.