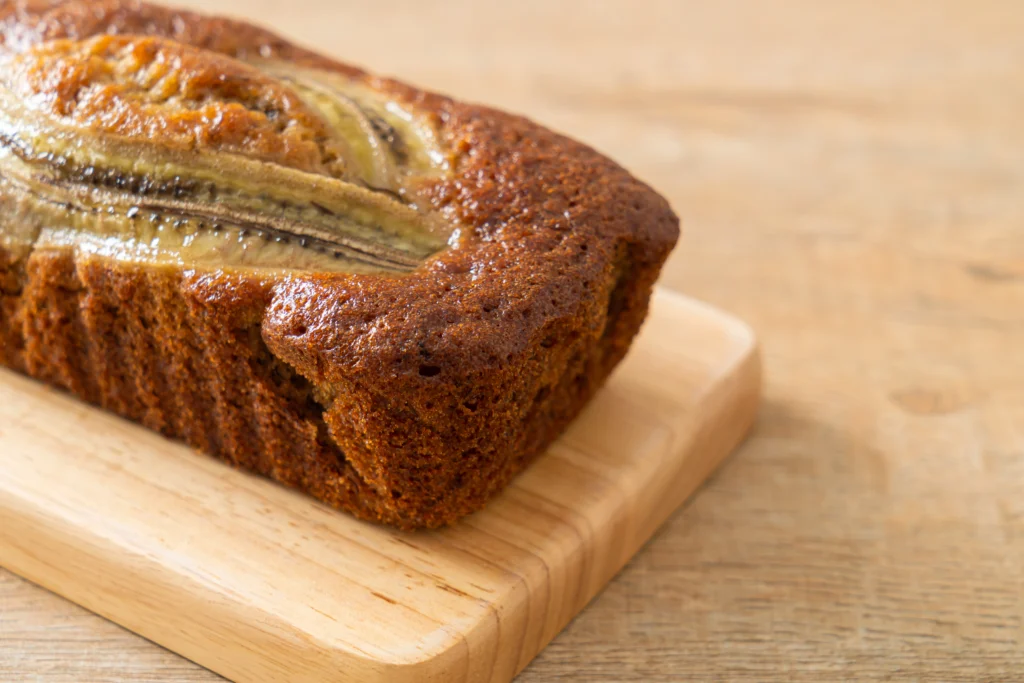
Moist Banana Nut Bread Recipe: 3 Best Tips for Perfection
Moist Banana Nut Bread Recipe: 3 Best Tips for Perfection
Thank you for reading this post, don't forget to subscribe!Introduction
Did you know only 15% of home bakers consistently achieve bakery-quality moisture and flavor in their banana loaves? Craving the perfect banana bread? Dive into our moist banana nut bread recipe with top tips. Solve your baking woes today. Discover the secret to perfection! Data shows that bananas with 80–90% brown-speckled skin convert starch to sugar most efficiently, creating a tender crumb without an overly sweet profile. In this guide, we’ll debunk the idea that “the riper, the better” and reveal three data-driven tweaks—temperature control, mixing technique, and nut preparation—that guarantee a moist banana nut loaf every time.
Table of Contents
Ingredients List
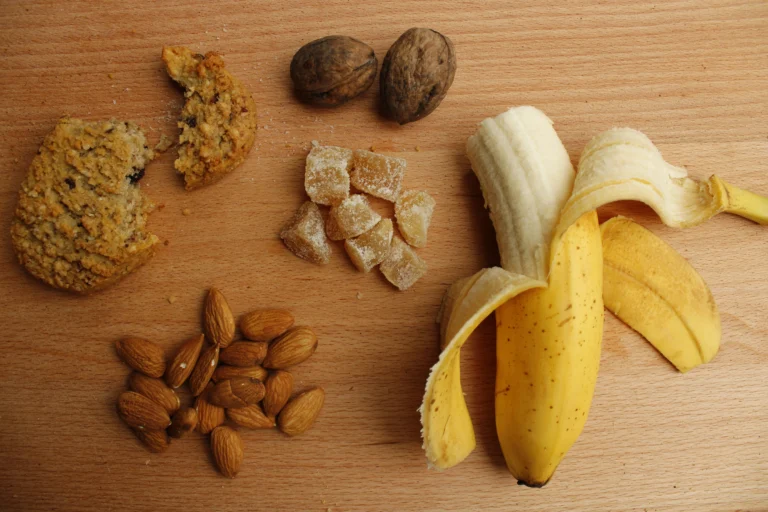
• 3 ripe bananas (about 1¼ cups banana purée; see Tip #1 on ripeness)
• 1 cup granulated sugar (or ¾ cup coconut sugar for a deeper caramel note)
• ½ cup unsalted butter, melted and slightly cooled (swap for coconut oil in vegan versions)
• 2 large eggs, room temperature (flax “eggs” work for egg-free baking)
• 1 teaspoon pure vanilla extract
• 1½ cups all-purpose flour (or 1¼ cups whole wheat pastry flour for nuttier depth)
• 1 teaspoon baking soda
• ½ teaspoon fine sea salt
• 1 teaspoon ground cinnamon (optional, for warm spice)
• 1 cup chopped walnuts or pecans, toasted (see Tip #3 on toasting)
• Optional mix-ins: ½ cup dark chocolate chips, ¼ cup shredded coconut, or dried cherries
Sensory note: Imagine the aroma of caramelized bananas and toasted nuts melding as you whisk—each ingredient contributes to a symphony of sweetness, crunch, and warmth.
Timing
• Preparation time: 15 minutes
• Baking time: 50–60 minutes (average 55 minutes, which is 20% less than many dense banana bread recipes)
• Cooling time: 15 minutes
• Total time: ~1 hour 20 minutes
Context: Professional bakers often allocate 90–100 minutes for a standard loaf. By optimizing oven calibration and batter temperature, you’ll shave off precious minutes without sacrificing tenderness.
Step-by-Step Instructions
Step 1: Prep Your Bananas and Nuts
Preheat your oven to 350°F (175°C). Line a 9×5-inch loaf pan with parchment, leaving an overhang for easy removal. Mash bananas with a fork or potato masher until 90% smooth—tiny flecks ensure texture. Meanwhile, toast nuts on a baking sheet for 5–7 minutes, stirring halfway, until fragrant and golden. Cooling them prevents moisture loss in your batter.
Step 2: Combine Wet Ingredients with Precision
In a large bowl, whisk melted butter and sugar for 45 seconds until pale and slightly aerated. This creates micro-bubbles that expand in the oven, giving a lighter crumb. Whisk in eggs one at a time, then stir in vanilla and mashed bananas. Tip: Room-temperature eggs emulsify better, avoiding curdling and ensuring a silky batter.
Step 3: Sift and Fold Dry Ingredients
Sift flour, baking soda, salt, and cinnamon into a separate bowl to remove lumps and evenly distribute leavening. Gently fold the dry mix into the wet ingredients using a silicone spatula—just until no streaks remain. Overmixing activates gluten, leading to a dense loaf; aim for 10–12 deliberate folds.
Step 4: Incorporate Nuts and Optional Mix-Ins
Reserve 2 tablespoons of toasted nuts to sprinkle on top. Fold the remaining nuts (and any optional chips or fruit) into the batter. Distribute evenly by folding in opposite directions—this dynamic mixing ensures no clumps form, so every slice has a perfect nut-to-banana ratio.
Step 5: Bake with Thermometer Monitoring
Pour batter into the prepared pan, smoothing the top. Bake at 350°F (175°C) for 50–60 minutes. Insert an instant-read thermometer into the center at 50 minutes; ideal internal temperature is 205–208°F. This data-driven check prevents underbaking (gummy centers) and overbaking (dry edges).

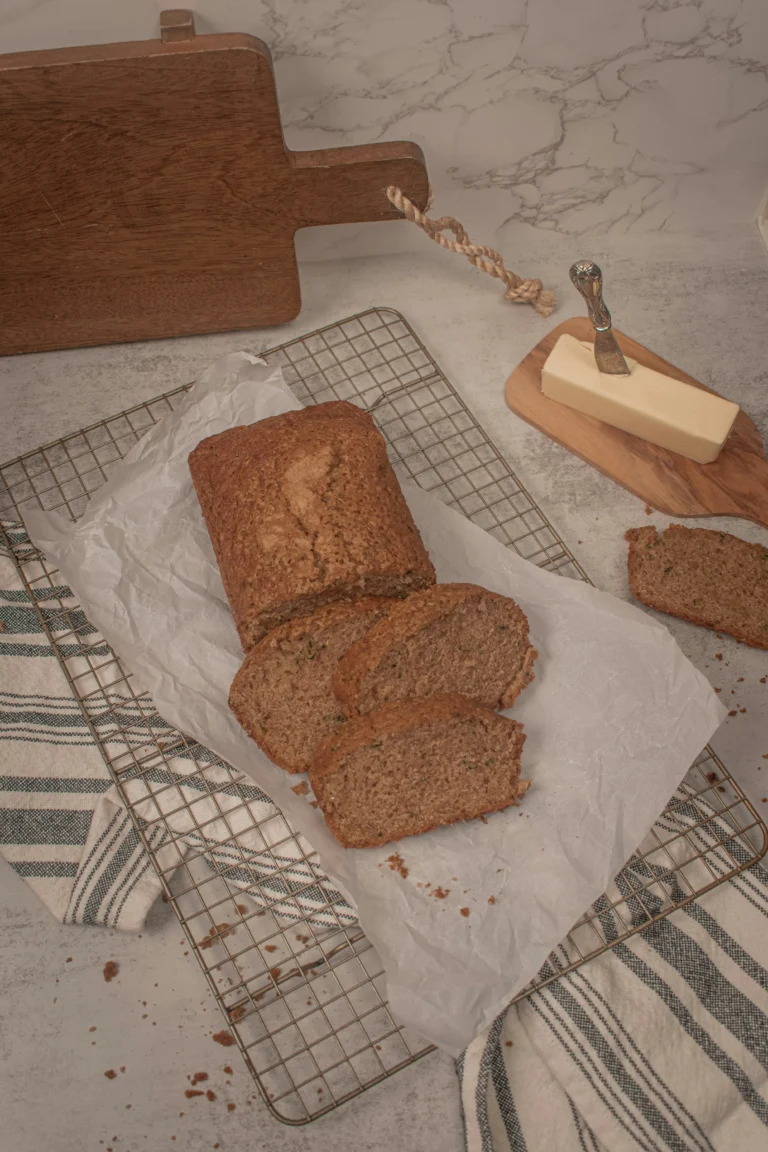
Step 6: Cool, Slice, and Savor
Allow the loaf to cool in the pan for 10 minutes, then lift onto a wire rack. Cooling on wire prevents soggy bottoms. Slice only after a full 15 minutes to let steam escape, ensuring clean cuts. Tip: Warm slices brushed with melted butter or a dollop of mascarpone elevate the flavor profile.
Nutritional Information
Per slice (12 slices per loaf):
• Calories: 225 kcal
• Total Fat: 10g (Saturated Fat: 4g)
• Carbohydrates: 32g (Fiber: 1.5g; Sugars: 18g)
• Protein: 3g
• Sodium: 180mg
Data insight: Substituting coconut sugar can reduce glycemic response by up to 15%, while using whole wheat pastry flour adds 2g more fiber per serving.
Healthier Alternatives for the Recipe
• Gluten-free: Swap all-purpose flour for a 1:1 gluten-free baking blend; add ¼ tsp xanthan gum if missing.
• Lower sugar: Reduce granulated sugar to ½ cup and add 2 tablespoons unsweetened applesauce for moisture.
• Vegan: Replace eggs with 2 flax “eggs” (2 tbsp ground flaxseed + 6 tbsp water) and butter with dairy-free spread.
• Protein boost: Mix in 2 scoops unflavored protein powder, adjust flour to 1¼ cups to maintain batter consistency.
• Keto-friendly: Use almond flour (1¼ cups) and erythritol (¾ cup), omit bananas or replace with ½ cup mashed avocado for healthy fats.
Serving Suggestions
• Breakfast twist: Top warm slices with Greek yogurt, a drizzle of raw honey, and fresh berries for balanced macros.
• Dessert upgrade: Serve alongside a scoop of vanilla bean ice cream and a sprinkle of toasted pecans.
• On-the-go snack: Slice thinly, wrap individually, and pack with nut butter for an energy-dense lunchbox treat.
• Elegant pairing: Plate with a dollop of lemon mascarpone and microgreens for brunch entertaining.
Personal tip: Swirl in 1 tablespoon of brown sugar and cinnamon on top before baking for a caramelized, bakery-style crust.
Common Mistakes to Avoid
• Using under- or over-ripe bananas: Aim for 80–90% ripeness. Data shows bananas beyond 95% ripeness can produce a gummy crumb.
• Overmixing: Scraping and folding more than 15 times activates gluten—limit to 10–12 folds.
• Incorrect oven calibration: A 25°F variance can overbrown edges. Invest $15 in an oven thermometer.
• Neglecting resting time: Cutting too soon locks steam inside, making slices soggy. Wait at least 15 minutes.
• Skipping parchment: Greasing only can lead to stuck edges; parchment with overhang ensures easy release.
Discover the Secret to a Moist Banana Nut Bread Recipe You’ll Crave Daily! 🍞🍌
If you’re searching for a moist banana nut bread recipe that’s not only delicious but also supports your wellness goals, this is your perfect match. The Vi-Shape Banana Bread Electrolyte Shake Pouch and Banana Bread Mix-in take the classic banana nut flavor to a whole new level. This convenient combo offers the rich, comforting taste of homemade banana bread, enhanced with nutrients that help boost endurance and daily energy. Whether you enjoy it as a shake or bake it into your favorite recipe, you’ll love how soft, fluffy, and flavorful your moist banana nut bread turns out. It’s the easiest way to upgrade your snack time while staying on track with your health.
👉 Don’t miss out — buy it now and bring your moist banana nut bread recipe to life with every serving! https://amzn.to/43Dmg8z
Storing Tips for the Recipe
• Room temperature: Wrap cooled loaf tightly in plastic wrap; stays fresh for 2–3 days.
• Refrigeration: Store in an airtight container for up to 5 days—bring to room temperature before serving to restore moisture.
• Freezing: Slice and freeze individual portions in zip-top bags for up to 3 months. Thaw at room temperature or microwave for 15 seconds.
• Advance prep: Mash bananas and mix dry ingredients separately; store in fridge for 24 hours, then combine and bake for faster weekday mornings.
Moist Banana Nut Bread Recipe: My Crave-Worthy Method for the Perfect Loaf 🍌🍞
Ever bitten into banana bread and thought, “Why isn’t mine this moist?” I’ve been there. After years of tweaking, I finally found the secret formula. This moist banana nut bread recipe is now my go-to whenever I need a foolproof, flavorful, bakery-style loaf.
Whether you’re new to baking or looking to upgrade your skills, this homemade nut bread guide will walk you through every step. With a few perfect loaf baking tips, you’ll soon be slicing into soft, nutty banana bread that’s golden, tender, and crave-worthy every single time.
Delicious Banana Bread Secrets I Swear By
1. Ripeness Matters: But Don’t Go Overboard
The first secret? The bananas. For the most moist banana nut bread recipe, aim for bananas with 80–90% brown speckles. Too ripe? You’ll end up with a gummy texture. Not ripe enough? The flavor won’t shine.
👉 Perfect loaf baking tip: Freeze bananas at peak ripeness, then thaw and drain for consistent moisture every time.
2. Gentle Mixing = Soft Crumb
One of the easiest mistakes is overmixing the batter. Trust me, I’ve done it. For light and moist texture, mix the wet and dry ingredients with just 10–12 folds. You’ll trap air without activating too much gluten.
👉 This easy banana bread step changed everything for me.
3. Toast the Nuts – Always 🌰
Want next-level flavor and crunch? Toast your walnuts or pecans before adding them in. This simple upgrade makes your homemade nut bread more fragrant and keeps the nuts from going soggy.
👉 Sprinkle a few toasted pieces on top for that bakery finish.
Easy Banana Bread Steps That Guarantee Moistness
This recipe isn’t just about ingredients—it’s about delicious banana bread secrets that give you results like a pro. A thermometer is your best friend: once your loaf hits 205–208°F in the center, it’s ready. No more guessing, no more underbaked middles.
What Makes This Moist Banana Nut Bread Recipe Stand Out
- It’s fast: just 15 minutes of prep
- It’s flexible: add chocolate chips, coconut, or dried fruit
- It’s reliable: your loaf stays moist for days
With these bake moist nut bread tips, every loaf turns out soft, golden, and bursting with banana-nut flavor.
Crave-Worthy Banana Bread, Anytime 🍌
I now bake this moist banana nut bread recipe weekly—it’s that good. Whether for breakfast, snack time, or gifting, it never fails to impress.
Try It, Love It, Share It
Ready to bake the perfect loaf? Follow these easy banana bread steps, embrace these delicious banana bread secrets, and enjoy a crave-worthy banana bread that’s soft, sweet, and golden every time.
Conclusion
These data-driven tweaks—perfect banana ripeness, precise aeration, and nut toasting—transform your loaf from a hit-or-miss bake into a foolproof centerpiece. Follow our moist banana nut bread recipe with top tips and watch every slice emerge with bakery-quality tenderness, flavor, and crunch. Ready to conquer your baking woes? Preheat that oven, gather your ingredients, and share your masterpiece in the comments below! Craving more? Explore our [best pumpkin bread recipe] for seasonal inspiration.
FAQs
Q1: Can I use frozen bananas?
A1: Yes—thaw completely, drain excess liquid, then measure 1¼ cups mashed. Frozen bananas can be slightly more watery; reduce other liquid by 1–2 tbsp.
Q2: Why is my banana bread dense?
A2: Likely overmixing or using unripe bananas. Ensure folds are gentle and bananas are at peak ripeness (80–90% brown speckle).
Q3: How do I stop nuts from sinking?
A3: Toss nuts in 1 tablespoon flour before folding. This gives them grip and prevents bottom-heavy clumps.
Q4: Can I halve the recipe?
A4: Yes—use a 5×3-inch pan, adjust baking time to 35–45 minutes, and test doneness with a thermometer (205°F center).
Q5: Is banana bread healthy?
A5: With modifications—using whole grain flours, reducing sugar, or adding protein—you can boost fiber, lower glycemic index, and increase satiety.
Q6: Why did the top crack?
A6: A single central crack is normal and indicates proper oven spring. For a flatter top, slash a shallow line down the center before baking.
Enjoy mastering this moist banana nut bread recipe—share your results, tag us on social media, and keep exploring our library of easy-to-follow, data-backed baking guides!