Apple Fritter Bread Recipe: Sweet Cinnamon Apple Loaf Made Easy
There is something truly magical about the scent of warm cinnamon drifting through my home on a crisp autumn morning. It reminds me of slow weekends spent gathered around the table with the people I love most.
Thank you for reading this post, don't forget to subscribe!I have always adored the classic bakery treat, but the thought of deep frying at home often felt like too much work. That is why I developed this simple apple fritter bread recipe to capture those nostalgic flavors without the mess.
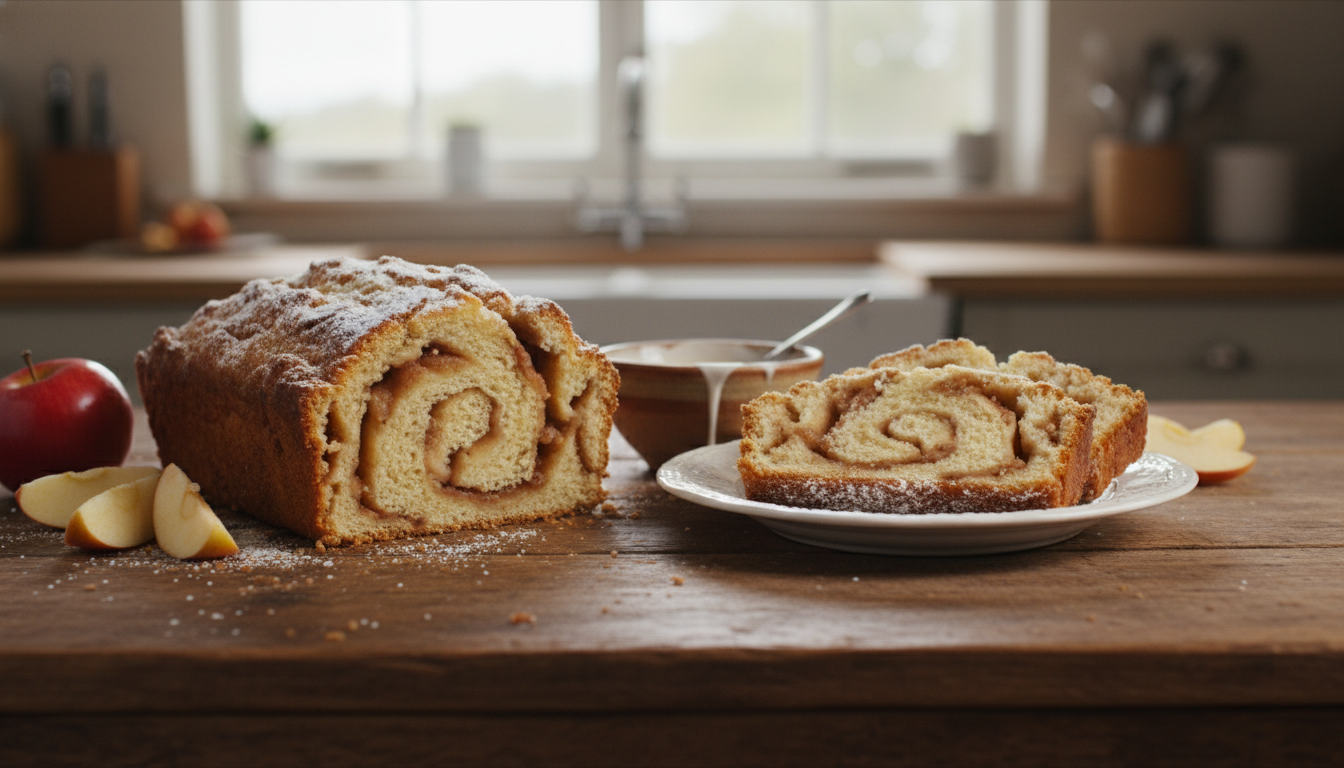
This delightful loaf offers a soft, buttery crumb packed with sweet fruit chunks and a signature spiced swirl. It has quickly become my go-to choice for brunch gatherings because it is incredibly easy to prepare and always impresses guests.
You will find that this method delivers that perfect, cozy texture we all crave during the cooler months. Let me show you how to bring this comforting favorite into your own kitchen today.
Table of Contents
Why This Apple Fritter Bread Recipe Is My Go-To Fall Treat
If you are looking for the ultimate comfort food, this apple fritter bread recipe is exactly what you need. There is something truly magical about the smell of cinnamon and apples wafting through the house on a crisp autumn morning. It captures the very essence of the season in every single bite.
I love this treat because it offers a comforting, nostalgic experience that tastes exactly like a bakery-fresh donut. The combination of a tender crumb and pockets of cinnamon-infused apples creates a flavor profile that feels like a warm hug. It is the perfect companion for a hot cup of coffee or tea.
“The secret to a perfect autumn day is found in the simple joy of baking something sweet and spiced for those you love.”
One of the best things about this apple fritter bread recipe is how incredibly easy it is to prepare. You do not even need a stand mixer to get started, which makes it an accessible project for bakers of all skill levels. Whether you are a seasoned pro or a kitchen novice, you will find success with this simple method.
I find that the lack of complex equipment makes the process feel much more relaxed and enjoyable. It remains a consistent favorite for my family and readers alike because it delivers professional results with minimal effort. You will quickly see why this loaf earns a permanent spot in your fall baking rotation.
Essential Ingredients for the Perfect Loaf
Every great apple fritter bread recipe relies on high-quality ingredients to achieve that perfect bakery-style finish. When you gather your supplies, remember that the quality of your produce and pantry staples directly impacts the final result. Taking a moment to prepare your workspace with these items ensures a smooth baking experience.
Selecting the Best Apples for Baking
The secret to a successful loaf lies in choosing apples that hold their shape under heat. I always recommend firm varieties like Granny Smith, Honeycrisp, or Braeburn. These types provide a crisp texture that prevents the bread from becoming mushy or overly soft.
Avoid using softer apples that are meant for applesauce, as they tend to lose their structure entirely. By selecting the right fruit, you ensure every bite of your apple fritter bread recipe has a satisfying, distinct apple flavor.
Dry Ingredients and Spices
Balancing your dry ingredients is vital for a proper rise and structure. You will need a reliable base of all-purpose flour, baking powder, and a pinch of salt to create the foundation of your loaf.
Spices are where the magic happens, especially when you want that classic fritter taste. I suggest using a generous amount of ground cinnamon to bring out the natural sweetness of the fruit. Consider these essential dry components:
- All-purpose flour: Provides the necessary structure.
- Baking powder: Ensures the loaf rises beautifully.
- Ground cinnamon: Adds that signature warm, aromatic spice.
- Granulated and brown sugar: Creates a perfect balance of sweetness.
Wet Ingredients for Moisture and Texture
To achieve a rich, tender crumb, the wet ingredients must be handled with care. I find that using a combination of milk and eggs creates a stable batter that holds the apple chunks perfectly.
For an extra touch of decadence, adding a dollop of sour cream or Greek yogurt can make a world of difference. These dairy additions contribute to a moist, dense texture that makes this apple fritter bread recipe truly stand out. Always ensure your ingredients are at room temperature before you begin mixing to guarantee the best possible consistency.
Preparing Your Kitchen and Equipment
Getting your kitchen ready is the most important step in mastering this apple fritter bread recipe. I believe that a well-organized workspace turns a complex task into a relaxing experience. By gathering everything you need beforehand, you avoid unnecessary stress while the batter is ready to bake.
Must-Have Baking Tools
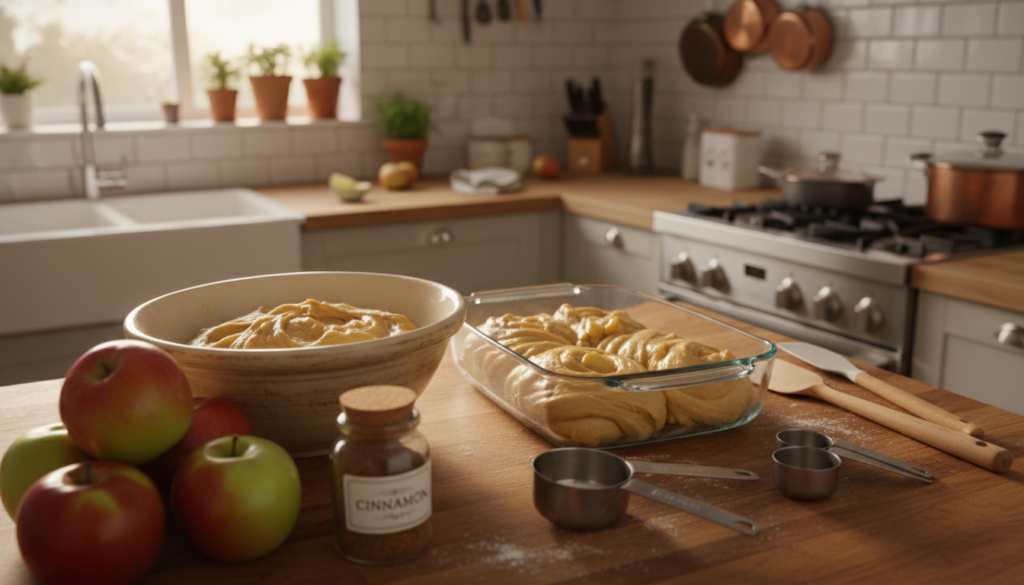
To achieve the best results, I rely on a few essential tools that make the process seamless. You will definitely need a standard 9×5-inch loaf pan to ensure your bread rises to the perfect height. I also recommend having a sturdy whisk, a rubber spatula, and two mixing bowls on hand.
Using high-quality equipment helps maintain consistency every time you bake. I always keep my measuring cups and spoons within reach to ensure accuracy. Having these items ready allows you to focus entirely on the flavors of your loaf.
Proper Oven Calibration and Pan Preparation
Consistent heat is the secret to a perfectly baked loaf. I suggest using an oven thermometer to verify that your oven is truly at the temperature it displays. Even a small difference in heat can change how your bread sets, so proper calibration is vital for success.
Before pouring in your batter, take a moment to prepare your pan correctly. I always line my loaf pan with parchment paper, leaving a slight overhang on the sides. This simple trick prevents the bread from sticking and makes it incredibly easy to lift the finished loaf out of the pan once it cools.
Step-by-Step Guide to Mixing the Apple Filling
Let’s dive into the heart of this apple fritter bread recipe by preparing the spiced apple filling. This component provides those signature pockets of sweetness and warmth that make every bite so delightful.
By preparing this mixture separately, you allow the flavors to meld beautifully before they ever touch the batter. This simple step ensures that your fruit stays juicy and flavorful throughout the entire baking process.
Choosing the Right Cinnamon and Sugar Ratio
The balance of spice is crucial for achieving that classic fritter taste. I recommend using a blend of granulated sugar and high-quality ground cinnamon to coat your diced apples.
A standard ratio of one tablespoon of cinnamon to a half-cup of sugar works wonders for most apple varieties. Feel free to adjust this slightly if you prefer a bolder, spicier profile in your finished loaf.
Coating the Apples for Maximum Flavor
Once you have your spice blend ready, toss your diced apples thoroughly in a mixing bowl. You want to ensure that every single piece is evenly coated, as this helps the sugar draw out just enough moisture.
This process creates a concentrated syrup that infuses the fruit with deep flavor. When you follow this apple fritter bread recipe, you will notice how these small details lead to a much more professional result.
Allow the mixture to sit for about ten minutes before layering it into your batter. This brief resting period is the secret to achieving the perfect consistency in every slice.
Creating the Perfect Batter Consistency
Mastering your batter consistency will transform your homemade treat into a professional-quality dessert. When you follow this apple fritter bread recipe, the texture of your final loaf depends entirely on how you handle the base ingredients. Achieving the right balance ensures your bread remains soft, tender, and delicious.
Creaming Butter and Sugar Effectively
The process begins by creaming your butter and sugar together until the mixture is light and fluffy. This step is essential because it incorporates tiny air bubbles into the fat. These air pockets expand during baking, which gives your loaf a beautiful, airy crumb structure.
I recommend using room-temperature butter to ensure it blends smoothly with the sugar. If the butter is too cold, it will not aerate properly, leading to a heavier loaf. You should beat the mixture for at least three minutes until it looks pale and creamy.
Incorporating Flour Without Overmixing
Once your wet ingredients are ready, you must add the flour with great care. Overmixing is the most common mistake when preparing an apple fritter bread recipe, as it develops too much gluten. This extra gluten can turn a light, fluffy loaf into something dense or rubbery.
To keep your bread tender, follow these simple guidelines for the best results:
- Use a spatula to gently fold the flour into the wet mixture.
- Stop mixing as soon as you no longer see streaks of dry flour.
- Avoid using a high-speed electric mixer during this final stage.
By treating your batter with patience, you guarantee that your homemade creation will have the perfect mouthfeel. Proper mixing techniques are the hallmark of a great baker and will make your apple fritter bread recipe a standout success every time you bake it.
Layering the Batter and Apple Filling
The secret to a bakery-style loaf lies in how you layer your ingredients. When you follow this apple fritter bread recipe, the goal is to ensure that every single bite contains a perfect balance of spiced fruit and tender crumb.
Techniques for Even Distribution
I always start by spreading a thin layer of batter at the bottom of my prepared loaf pan. This creates a sturdy foundation for the heavy apple mixture. Next, I add a generous portion of the cinnamon-coated apples, spreading them out to reach the edges of the pan.
Repeat this process by alternating layers until you have used all your components. Consistency is key when building your loaf, so try to keep your layers uniform in thickness. This careful approach ensures that your apple fritter bread recipe delivers a consistent flavor profile from the first slice to the last.
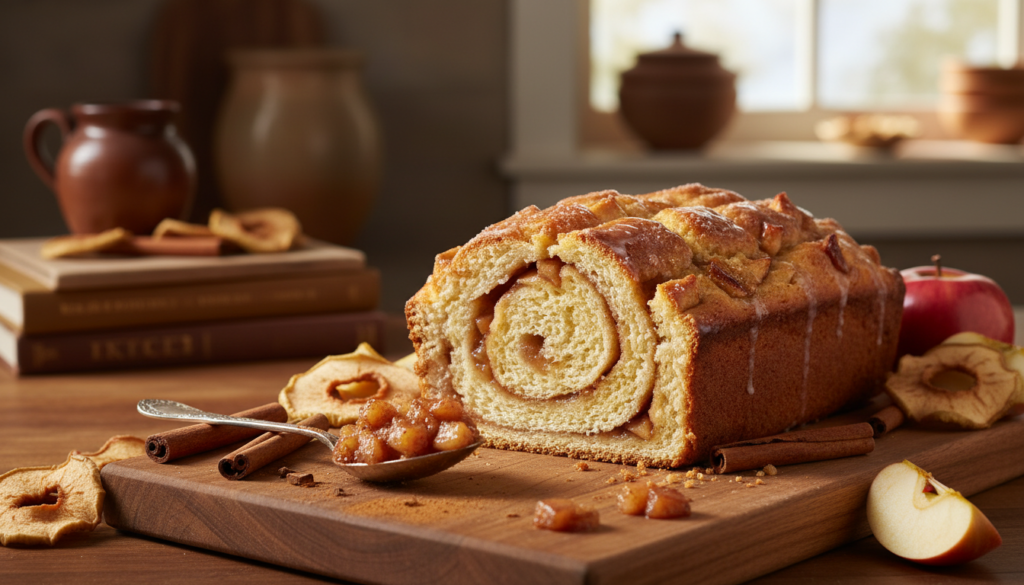
Creating the Signature Swirl Effect
Once all your layers are in the pan, it is time to create that beautiful, professional-looking ribbon effect. Take a butter knife and gently drag it through the batter in a zigzag motion. Do not over-mix the layers, as you want to maintain distinct pockets of cinnamon-apple goodness.
A light touch is essential here to keep the textures separate yet integrated. If you stir too vigorously, you will lose the beautiful definition that makes this apple fritter bread recipe look so impressive. Simply pull the knife through the mixture a few times, and you will achieve that perfect, marbled appearance every time.
Baking and Monitoring Your Loaf
Achieving the perfect texture in your apple fritter bread recipe requires careful attention while it bakes. I find that the aroma of cinnamon and apples is a great indicator, but you should rely on specific visual and physical cues to ensure the center is cooked through.
Determining When the Bread Is Fully Baked
The most reliable way to check for doneness is the classic toothpick test. Simply insert a wooden skewer or toothpick into the thickest part of the loaf.
- If it comes out clean or with just a few moist crumbs, your bread is ready.
- If you see wet batter, it needs a few more minutes in the oven.
- The top should look golden brown and feel firm to the touch.
“Baking is both a science and an art; always trust your senses, but verify with a tool to ensure the interior is perfectly set.”
Troubleshooting Common Baking Issues
Sometimes, the top of your apple fritter bread recipe might brown too quickly before the middle has finished setting. If you notice this happening, do not panic. You can easily tent a piece of aluminum foil over the top of the pan to prevent further darkening while the interior continues to bake.
If you find that your loaves are consistently undercooked or burnt, your oven might be miscalibrated. Using an inexpensive oven thermometer can help you verify the actual temperature inside your appliance. Following this apple fritter bread recipe with precision will ensure that your final result is moist, flavorful, and perfectly baked every single time.
Crafting the Sweet Glaze Topping
A glossy, sweet glaze is the secret weapon for turning a simple loaf into a professional-looking dessert. This final step is what truly makes my apple fritter bread recipe feel like a high-end bakery treat. It adds a beautiful sheen and a necessary burst of sweetness that balances the warm cinnamon notes perfectly.
Achieving the Ideal Glaze Consistency
To create the perfect texture, I start with a base of powdered sugar and a small amount of milk or heavy cream. I find that slowly adding the liquid is the best way to control the thickness of the mixture. If you prefer a thin, delicate drizzle, add milk one teaspoon at a time until you reach a pourable consistency.
For those who love a thicker, more indulgent coating, keep the mixture slightly stiffer. You want it to be thick enough to cling to the top of the loaf without running off the sides entirely. Consistency is key to ensuring your glaze looks intentional and appetizing.
“Baking is a labor of love that is best shared with those who appreciate the sweet details.”
Applying the Glaze for a Professional Finish
Timing is everything when it comes to the final application. I always wait until the bread has cooled to room temperature before I begin glazing. If the loaf is still warm, the glaze will melt and soak into the bread rather than setting into a beautiful, opaque layer.
Using a whisk or a fork, I drizzle the glaze back and forth across the top of the loaf in a steady motion. This technique creates that classic, rustic look associated with a traditional apple fritter bread recipe. Once applied, let the glaze sit for about ten minutes to set properly before slicing. This simple patience ensures a clean, professional finish that will impress anyone you share it with.
Storage and Serving Suggestions
Now that your kitchen smells amazing, you might wonder how to keep your loaf moist and flavorful. Following this apple fritter bread recipe requires a little care once the baking is done to ensure you can savor every last crumb.
Keeping Your Bread Fresh Longer
To maintain the best texture, store your bread in an airtight container at room temperature for up to two days. If you live in a humid climate, I recommend keeping it in the refrigerator to prevent any spoilage.
When storing in the fridge, wrap the loaf tightly in plastic wrap or place it in a sealed bag. This simple step prevents the bread from drying out or absorbing other odors from your refrigerator.
- Use a glass or plastic airtight container for maximum freshness.
- Keep the loaf away from direct sunlight or heat sources.
- If you need to store it longer than four days, consider freezing individual slices.
Creative Ways to Serve Apple Fritter Bread
There are many ways to elevate your apple fritter bread recipe beyond just a simple slice. I love warming up a piece in the microwave for about 15 seconds to restore that fresh-from-the-oven texture.
You can also try these serving ideas to impress your guests or treat yourself:
- Toast it: Lightly butter a slice and toast it in a pan until golden brown.
- Add a topping: Serve with a dollop of whipped cream or a scoop of vanilla bean ice cream.
- Pair with coffee: The cinnamon notes in this bread make it the perfect companion for a hot cup of morning coffee.
Whether you enjoy it warm or at room temperature, this treat remains a highlight of any fall gathering. By following these storage tips, you ensure that your hard work results in a delicious experience every single time.
Conclusion
Baking this apple fritter bread recipe transforms your kitchen into a warm, inviting space filled with the scent of cinnamon and fresh fruit. You now possess the skills to create a professional-quality loaf that rivals any local bakery.
I encourage you to share this apple fritter bread recipe with your neighbors or keep it as a special weekend treat for your family. The combination of tender apples and a sweet glaze creates a memorable experience for everyone at your table.
My hope is that you return to this apple fritter bread recipe whenever you crave a bit of seasonal comfort. Please share your baking results with me or tag your photos on social media. I love seeing how your loaves turn out when you add your own personal touch to the process.