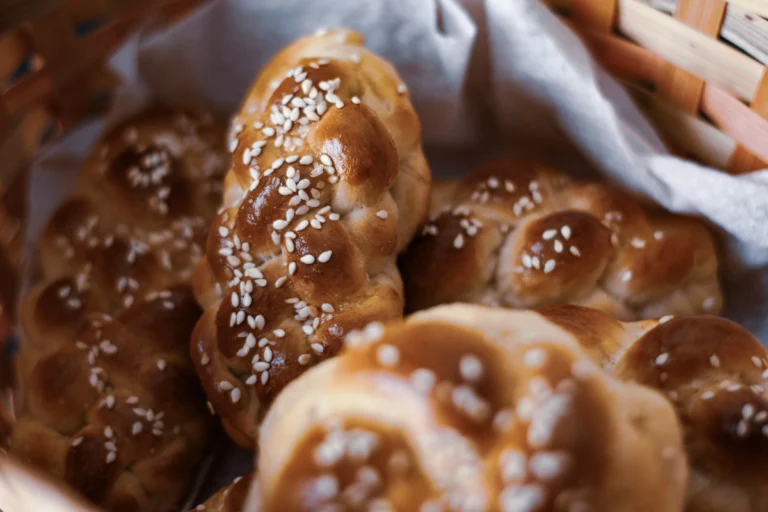
Msemen Recipe Mistakes I Made 3 Times (And How to Avoid Them)
I still remember the first time I tried to recreate the golden, flaky layers of Moroccan msemen in my own kitchen. I expected a simple process, but I ended up with a tough, chewy mess that looked nothing like the street food I fell in love with abroad.
Thank you for reading this post, don't forget to subscribe!It was a humbling experience that taught me that this traditional bread requires more than just basic ingredients. I made the same errors three times before I finally unlocked the secret to that perfect, buttery crunch.
By sharing my journey, I want to save you from the same kitchen frustrations. Whether you are a beginner or just looking to refine your technique, this msemen recipe guide will help you master the art of folding and frying. Let’s turn your next attempt into a delicious success.
Table of Contents
My Journey with the Traditional Msemen Recipe
My path to mastering this layered bread began with a single, unforgettable bite in a local market. I was captivated by the delicate, buttery layers that seemed to melt away with every mouthful. I knew immediately that I had to recreate this traditional msemen in my own kitchen back in the United States.
I quickly discovered that this dish is far more than just a simple meal. It serves as a cornerstone of the Moroccan breakfast table and represents a daily rhythm for countless families. Preparing msemen for breakfast is a ritual that demands both time and a gentle, practiced touch.
“Food is the most accessible way to understand the heart of a culture, and bread is the language that everyone speaks.”
Understanding the cultural weight of this recipe changed my entire approach. I stopped viewing it as a quick task and started seeing it as a rewarding culinary endeavor. The following table highlights the differences between my initial expectations and the reality of the process.
| Aspect | Initial Expectation | Actual Reality |
|---|---|---|
| Preparation Time | Under 30 minutes | Requires resting periods |
| Technique | Simple folding | Requires precise stretching |
| Skill Level | Beginner friendly | Requires patience to master |
Mastering the art of traditional msemen requires you to slow down and respect the dough. When you serve freshly made msemen for breakfast, you are sharing a piece of history with your loved ones. It is a beautiful way to start the day with intention and care.
Mistake One: Underestimating the Importance of Flour Quality
I once thought any bag of flour would work for my cooking, but that mistake cost me my first few batches. When I first attempted a traditional msemen recipe, I used standard all-purpose flour exclusively. The result was a tough, rubbery flatbread that lacked the signature layers I had seen in Moroccan kitchens.
Why Semolina and All-Purpose Flour Ratios Matter
The secret to achieving that perfect, slightly chewy interior lies in the specific blend of ingredients. Using only all-purpose flour creates a bread that is too soft and lacks the necessary structure to hold those delicate, flaky layers. Fine semolina provides the essential grit and protein needed to give the dough its characteristic bite.
I found that a balanced ratio is the foundation of a successful msemen dough recipe. By combining the elasticity of all-purpose flour with the strength of semolina, you ensure the dough stretches thin without tearing. This combination is what transforms a simple flatbread into a culinary masterpiece.
Sourcing the Right Ingredients in the United States
Finding high-quality fine semolina in the United States can be a bit of a challenge for beginners. Many local grocery stores carry coarse semolina, which is better suited for pasta than for this specific flatbread. I recommend checking international markets or specialty baking aisles to find the finest grind possible.
If you cannot find it locally, ordering high-quality semolina online is a worthwhile investment for your kitchen. Using the correct flour ensures your msemen recipe turns out authentic every single time. Do not settle for inferior ingredients, as they will only lead to a dense and disappointing final product.
Mistake Two: Rushing the Dough Kneading Process
If you want to master the perfect msemen dough recipe, you must stop rushing the kneading phase. In my early days, I often cut this step short, thinking the dough looked smooth enough after just a few minutes. I was wrong.
My impatience resulted in dough that fought back, snapping and tearing whenever I tried to stretch it. Learning how to make msemen requires a deep respect for the time it takes to build structure. Without proper development, you simply cannot achieve those signature paper-thin layers.
The Science of Gluten Development in Msemen
Kneading is not just about mixing ingredients; it is a chemical process that organizes proteins. As you work the dough, you align gluten strands into a strong, interconnected network. This network provides the elasticity needed to stretch the dough without it breaking apart.
When you rush this stage, the gluten remains disorganized and weak. A well-kneaded dough feels supple and alive under your hands. It is the foundation of a successful msemen dough recipe that holds its shape during the folding process.
How to Tell When Your Dough is Perfectly Elastic
You will know your dough is ready when it transitions from a shaggy, sticky mess to a smooth, satiny ball. It should feel soft, slightly tacky, but not overly sticky. If you poke it with your finger, the dough should spring back quickly.
The Windowpane Test Explained
The most reliable way to check your progress is the windowpane test. Take a small piece of dough and gently stretch it between your fingers. If you have kneaded it enough, you should be able to pull it into a thin, translucent membrane that lets light pass through without tearing.
If the dough breaks immediately, keep kneading for a few more minutes. Mastering this technique is the ultimate secret to how to make msemen that looks professional and tastes authentic. Once you see that thin, elastic film, you know your dough is ready for the next stage.
Mistake Three: Improper Folding Technique for Flaky Layers
If you want those perfect, flaky layers, you have to stop being timid with your dough. Early in my baking journey, I was far too gentle during the assembly process. I quickly realized that a proper msemen folding technique is the only way to achieve that iconic, airy texture we all crave.
Why Thinness is Key to Success
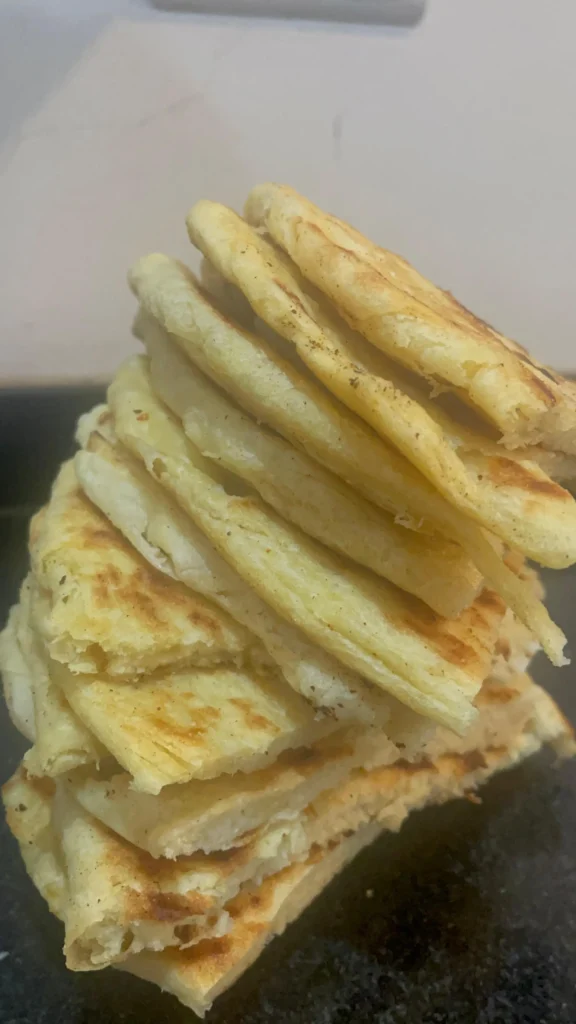
The secret to success lies in how thin you stretch your dough before folding. You must aim for a surface so thin that it becomes nearly translucent. This extreme thinness allows the steam to create distinct air pockets between the layers while the bread cooks on the griddle.
If the dough remains too thick, the layers will fuse together into a dense, chewy mass. I always remind myself to work slowly and patiently, pulling the edges outward until the dough is paper-thin. This extra effort is what separates a mediocre flatbread from a truly authentic one.
Managing Your Butter and Oil Mixture
Beyond the physical stretching, you must master the application of your fat mixture. A blend of melted butter and oil acts as a vital barrier between the layers of dough. Without this layer, the dough will simply stick to itself, preventing the signature flaky separation.
I recommend using a light hand to brush the mixture evenly across the surface before each fold. This msemen folding technique ensures that every single layer remains separate and crisp. When you apply the fat correctly, the heat of the pan causes the moisture to evaporate, creating those beautiful, golden-brown layers.
| Folding Method | Layer Separation | Texture Result |
|---|---|---|
| Timid/Thick | Minimal | Dense and Chewy |
| Paper-Thin | Excellent | Light and Flaky |
| Uneven Fat | Patchy | Inconsistent |
Essential Ingredients for Authentic Moroccan Msemen
My kitchen experiments taught me that the secret to authentic Moroccan msemen lies in the quality of your pantry staples. When you start with the right foundation, the entire process becomes much smoother and more rewarding. I have learned that cutting corners on ingredients often leads to disappointing results, so I always prioritize freshness and quality.
Selecting the Best Quality Semolina
The heart of any traditional msemen is the flour blend. You should look for high-quality fine semolina, often labeled as “extra-fine” or “durum semolina” in specialty stores. This specific type of flour provides the necessary structure and that distinct, slightly nutty flavor that makes the bread so special.
If you cannot find fine semolina at your local grocery store, do not worry. Many online retailers now ship high-quality Moroccan-style flour directly to your door. Using the right grade of semolina ensures your dough has the perfect balance of elasticity and tenderness.
The Role of Salt and Warm Water
Salt is not just for flavor; it is essential for strengthening the gluten network in your dough. I always use fine sea salt to ensure it dissolves evenly throughout the mixture. Warm water is equally critical, as it helps to activate the yeast and makes the dough much easier to handle during the folding process.
You might be tempted to leave out the sugar, but I strongly advise against it. A small amount of sugar is vital for the browning process when you cook the bread on a hot skillet. It creates that beautiful, golden-brown finish that defines a perfect piece of bread.
| Ingredient | Primary Function | Pro-Tip |
|---|---|---|
| Fine Semolina | Provides structure | Use extra-fine grade |
| Warm Water | Activates gluten | Keep temperature mild |
| Sea Salt | Enhances flavor | Dissolve before mixing |
| Sugar | Aids caramelization | Use a small pinch |
Step-by-Step Guide to Preparing the Perfect Dough
Achieving the right texture starts long before you ever touch a hot skillet. Preparing the dough is a methodical process that requires both patience and attention to detail. When you follow a consistent routine, you ensure that your final result is always delicious.
Mixing and Resting the Dough
To begin your msemen recipe, combine your flour, semolina, salt, and water in a large bowl. You should knead the mixture until it becomes smooth and elastic, which is the secret to a great msemen dough recipe. Do not rush this stage, as the gluten needs time to develop properly.
Once the dough is smooth, the resting period is non-negotiable. I always let my dough rest for at least thirty minutes under a damp cloth. This step allows the gluten to relax, making the dough much easier to stretch later without tearing.
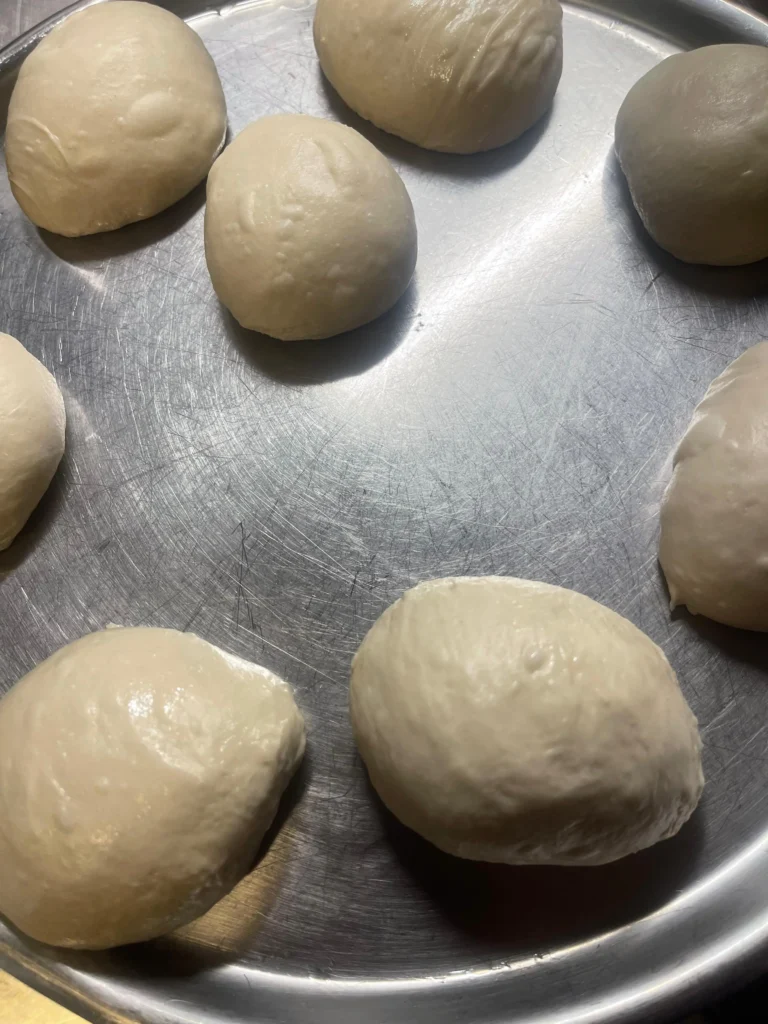
Dividing the Dough into Equal Portions
After the resting phase, you must divide the dough into equal portions to ensure your squares cook evenly. I recommend using a kitchen scale if you want perfect consistency when learning how to make msemen. Each ball should be roughly the size of a small orange.
Once divided, coat each portion lightly with oil to prevent them from drying out. Let them rest for another ten minutes before you begin the folding process. This extra time makes the dough incredibly pliable and easy to work with.
| Dough Stage | Action Required | Goal |
|---|---|---|
| Initial Mixing | Combine ingredients | Form a cohesive ball |
| Kneading | Work the dough | Develop elasticity |
| Resting | Cover and wait | Relax the gluten |
| Dividing | Portion equally | Ensure even cooking |
By following this structured approach, you will master how to make msemen with confidence. A well-prepared msemen dough recipe is the most important part of any successful msemen recipe. With practice, this process will become second nature in your kitchen.
Mastering the Art of the Msemen Folding Technique
Mastering the msemen folding technique is a journey that transforms simple ingredients into a culinary masterpiece. This specific process is the heart of the experience, requiring a delicate touch to ensure your layers remain distinct and light. When you handle the dough with patience, you unlock the potential for that signature flaky texture everyone loves.
Stretching the Dough Without Tearing
To begin, I always make sure my workspace is lightly oiled to prevent sticking. I gently press my fingers into the center of the dough ball, slowly pushing outward in a circular motion. The goal is to achieve a nearly transparent consistency without breaking the surface.
If you feel the dough resisting, let it rest for a few more minutes before trying again. Consistency is key when stretching, as even thickness across the entire surface ensures the bread cooks evenly. You want the dough to be thin enough to see through, which is the hallmark of a skilled baker.
Creating the Signature Square Shape
Once your dough is stretched thin, the folding process begins to build the internal structure. I fold the top and bottom edges toward the center, overlapping them slightly to create a long rectangle. This step is vital for the msemen folding technique because it traps air between the layers.
Next, I fold the left and right sides toward the middle to form a neat, compact square. I find that using a light touch during this stage keeps the layers from compressing too much. By mastering this rhythmic motion, you ensure that every bite of your finished bread is perfectly flaky and delicious.
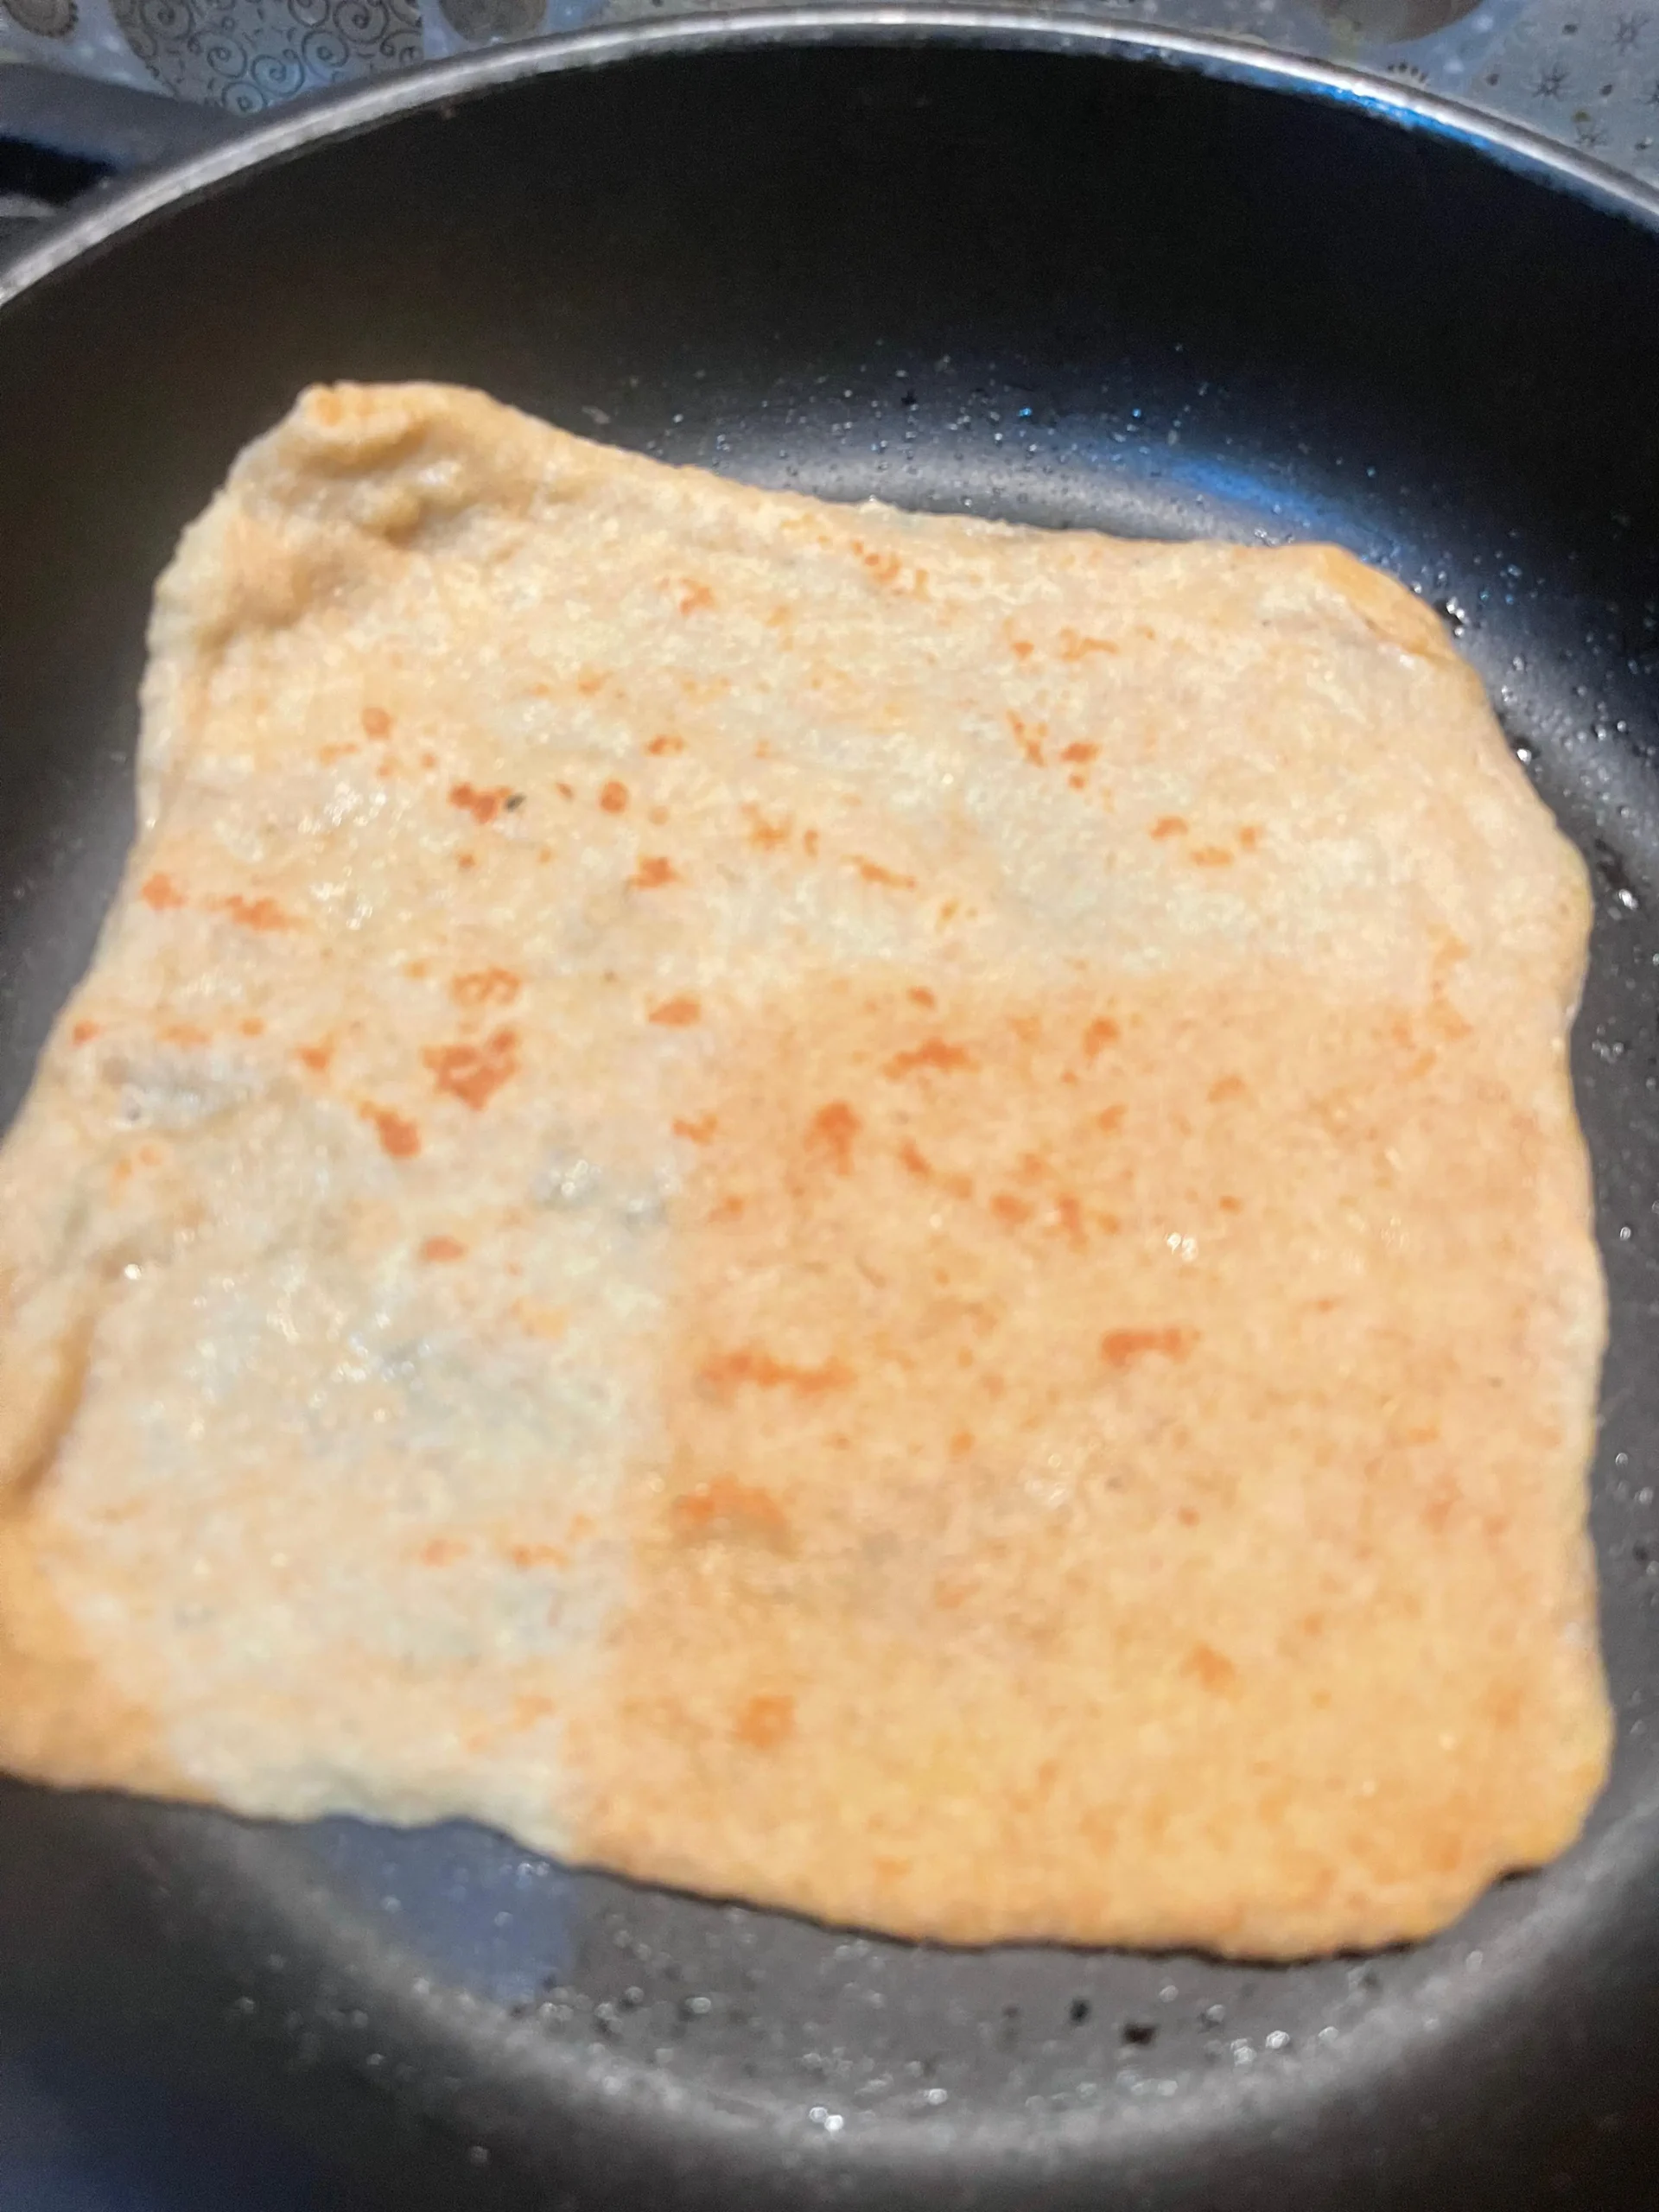
Tips for Achieving the Ideal Golden-Brown Crust
The secret to a beautiful, crispy exterior on your moroccan msemen lies in how you control the heat during the cooking process. I have found that patience is truly a virtue when you are standing over the stove. If the heat is too high, the outside will darken before the delicate, buttery layers inside have a chance to cook through properly.
Achieving that perfect golden-brown finish is the final step to culinary success. You want a color that is deep and inviting, not pale or charred. By keeping a close eye on the surface, you can ensure each piece is cooked to perfection.
Managing Heat Levels on Your Skillet
I always recommend starting with a medium-low heat setting. It is much easier to increase the temperature slightly than it is to fix a burnt crust. You should flip your dough every minute or so to ensure the heat distributes evenly across both sides.
When you see the dough puffing up slightly, that is your cue that the layers are separating as they should. If you notice the edges browning too quickly, simply slide the pan off the burner for a few seconds to stabilize the temperature. This simple adjustment helps you maintain a consistent, beautiful color throughout the entire batch of moroccan msemen.
The Importance of Using a Heavy-Bottomed Pan
Using the right equipment makes a world of difference in your kitchen. A heavy-bottomed pan, such as a cast-iron skillet, is essential because it retains heat far better than thin metal pans. This stability prevents hot spots that often lead to uneven cooking or burnt patches.
Because the heavy base holds heat so well, it allows the dough to crisp up slowly and steadily. This creates that signature crunch that everyone loves. Without this steady heat, your flatbread might end up chewy or undercooked in the center.
| Heat Setting | Cooking Goal | Result |
|---|---|---|
| Medium-Low | Even browning | Crispy exterior |
| Medium-High | Quick sear | Risk of burning |
| Low | Gentle warming | Soft, pale crust |
Creative Msemen Toppings to Elevate Your Breakfast
My kitchen experiments have shown me that this bread acts as the perfect canvas for both sweet and savory cravings. While the plain version is a delight on its own, adding msemen toppings allows you to customize every bite to your specific mood. Whether you are hosting a brunch or just looking for a quick snack, these additions bring a new level of excitement to your table.
Sweet Variations for a Morning Treat
When I prepare msemen for breakfast, I often lean toward classic sweet pairings that highlight the buttery layers of the dough. A simple drizzle of high-quality wildflower honey combined with a spread of softened grass-fed butter is truly unbeatable. You can also experiment with fresh seasonal berries or a thin layer of almond butter for a modern twist.
“Cooking is at once child’s play and adult joy. And cooking done with care is an act of love.”
Savory Fillings for a Hearty Lunch
If you prefer a more substantial meal, savory options turn this bread into a satisfying lunch. I love stuffing the layers with crumbled feta cheese, fresh chopped parsley, and a hint of chili flakes for a Mediterranean flair. For a heartier experience, adding thin slices of turkey or sautéed spinach creates a balanced dish that keeps you full for hours.
The following table outlines some of my favorite combinations to help you get started with your own culinary creations.
| Topping Category | Primary Ingredient | Flavor Profile |
|---|---|---|
| Sweet | Wildflower Honey | Rich and Floral |
| Sweet | Fresh Strawberries | Bright and Tart |
| Savory | Crumbled Feta | Salty and Tangy |
| Savory | Sautéed Spinach | Earthy and Fresh |
Ultimately, the best way to enjoy msemen for breakfast is to trust your palate and have fun with the process. There are no strict rules when it comes to choosing your favorite msemen toppings, so feel free to mix and match until you find your perfect signature combination.
Serving Suggestions: Msemen with Honey and Tea
Elevating your breakfast experience starts with how you choose to serve your warm, flaky creations. While the bread itself is a masterpiece of texture, the right accompaniments turn a simple snack into a truly authentic dining experience. I find that the ritual of serving is just as important as the baking process itself.
The Traditional Moroccan Tea Ceremony
In my home, I always pair my fresh msemen with tea to balance the richness of the dough. The traditional Moroccan tea ceremony is a beautiful display of hospitality that involves pouring the hot liquid from a height to create a delicate layer of foam.
This refreshing mint tea cuts through the buttery layers of the bread perfectly. The combination of the sweet, herbal tea and the savory, crisp pastry creates a harmonious contrast that is hard to beat. It is a sensory experience that invites you to slow down and enjoy every single bite.

Pairing Msemen with Local Honey and Butter
When it comes to msemen with honey, I prefer to create a warm syrup by melting high-quality butter and local honey together in a small saucepan. This simple mixture acts as the perfect dip for your warm squares.
You can experiment with various msemen toppings to suit your personal taste. Some people enjoy a sprinkle of toasted sesame seeds or a dollop of thick, creamy yogurt on the side. Regardless of your choice, keeping the bread warm is the secret to success for a comforting morning treat.
Troubleshooting Common Issues During Cooking
If your dough is fighting back or your layers feel tough, do not worry because I have been there too. Learning how to make msemen is a rewarding journey, but it often comes with a few unexpected bumps in the road. Even the most seasoned home cooks encounter these common hurdles when working with traditional dough.
Fixing Dough That Keeps Shrinking Back
When you try to stretch your dough and it snaps back like a rubber band, it usually means the gluten is too tight. This happens when the dough has not had enough time to relax after being divided into portions. The secret is patience.
Simply cover your dough balls with a damp cloth or a light coating of oil and let them rest for an additional 15 to 20 minutes. This extra time allows the gluten strands to loosen, making the msemen folding technique much easier to execute without tearing. You will notice the dough becomes significantly more pliable and willing to stretch into thin, translucent sheets.
Preventing Your Msemen from Becoming Too Chewy
A tough or overly chewy texture is often the result of over-kneading the dough or using too much flour during the shaping process. While kneading is essential for structure, working the dough for too long can make it rubbery. You want a soft, elastic texture that yields easily when you enjoy your msemen with tea.
To avoid this, ensure your dough remains slightly tacky to the touch rather than dry. If you find your finished bread is too firm, try reducing your kneading time by a few minutes in your next batch. Proper heat management on the skillet also plays a role, as cooking on a heat that is too low can dry out the layers before they have a chance to crisp up.
| Common Issue | Primary Cause | Quick Fix |
|---|---|---|
| Dough snaps back | Insufficient resting time | Rest for 20 more minutes |
| Tough, chewy texture | Over-kneading | Reduce kneading by 3 minutes |
| Dry, brittle layers | Too much flour used | Use more oil for folding |
| Burnt exterior | Heat too high | Lower flame to medium-low |
Conclusion
Learning to prepare traditional msemen is a rewarding journey that turns simple pantry staples into a culinary masterpiece. Your patience during the kneading and folding stages pays off with every flaky, golden bite you create in your own kitchen.
I encourage you to keep experimenting with your technique until you feel confident in your process. Serving fresh msemen for breakfast provides a wonderful start to your day that connects you to rich cultural roots. You might find that sharing these warm squares with friends creates lasting memories around your table.
Pairing your homemade creation with local honey and a steaming glass of mint tea elevates the entire experience. This simple ritual brings a touch of Morocco into your home. I look forward to hearing about your progress as you refine your skills and enjoy the delicious results of your hard work.