Breadmaker Bread Recipe: The Ultimate Guide to Soft, Fluffy Homemade Bread
There is something truly magical about waking up to the smell of fresh baking in your own home. I used to believe that achieving a perfect texture required years of professional training and a lot of manual labor. My trusty kitchen appliance changed everything for me by making the process simple and fun.
Thank you for reading this post, don't forget to subscribe!I am thrilled to share a reliable formula that produces a soft, cloud-like consistency every single time. It is my favorite way to enjoy warm, crusty slices without spending all day in the kitchen. You will love how easy it is to master this staple for your family and friends.
This guide will walk you through the essential steps to ensure your results are always consistent. I have spent months testing these specific instructions to find the best possible outcome for beginners. Let us dive into the secrets of creating a golden, delicious loaf right on your counter.
Table of Contents
Why I Love Using a Bread Machine
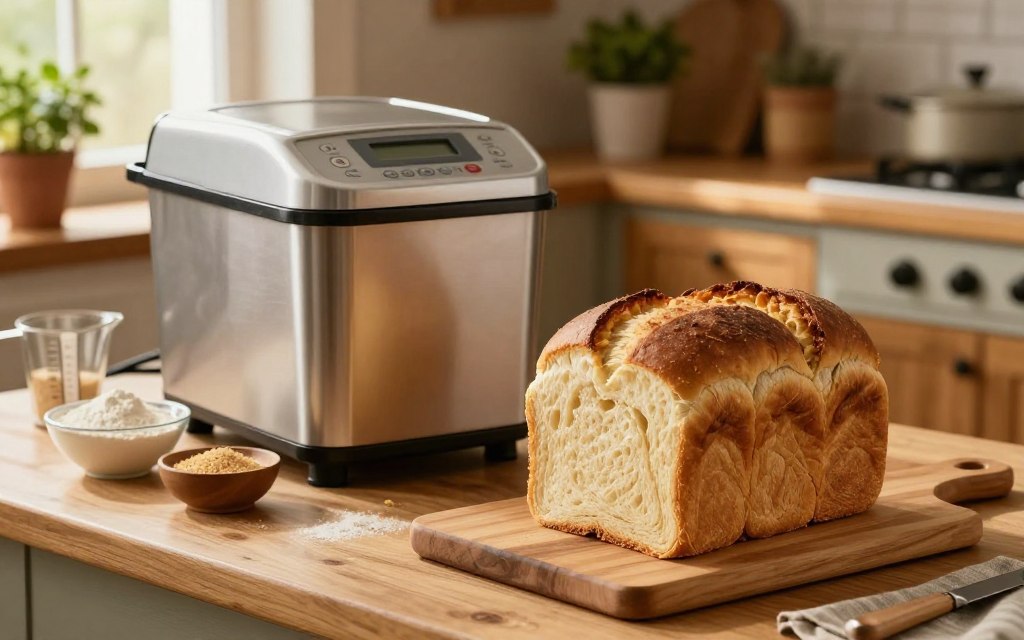
As someone who loves fresh homemade bread, I’ve found that a bread machine is a game-changer. Using a bread machine has simplified my baking routine, allowing me to enjoy soft, fluffy homemade bread without the hassle of traditional baking methods.
My experience with homemade bread began with traditional recipes, but it was the bread machine that truly made it a staple in my home. The convenience it offers is unparalleled.
The Convenience of Automated Baking
The automated process of a bread machine is a significant advantage. Simply add the ingredients, select the desired settings, and let the machine do the rest. This ease of use is perfect for busy days when manual baking isn’t feasible.
Here are some benefits of automated baking:
- Time-saving: You can do other tasks while your bread is being prepared.
- Consistency: The machine ensures that your bread is mixed, kneaded, and baked to perfection every time.
- Less effort: No need to manually knead or monitor the dough.
Comparing Homemade Bread to Store-Bought Loaves
Homemade bread, especially when made with a bread machine, offers a freshness and quality that store-bought loaves often can’t match. My Mom is 100% the best at baking homemade bread, and I’ve come to appreciate the difference it makes.
Some key differences include:
- Freshness: Homemade bread is best consumed fresh, offering a taste and texture that’s hard to beat.
- Customization: With a bread machine, you can experiment with various ingredients and recipes to create unique flavors.
- Ingredients: You control what goes into your bread, avoiding preservatives often found in commercial bread.

Essential Ingredients for the Perfect Loaf
To achieve the ultimate breadmaker bread recipe, it’s crucial to focus on the quality and type of ingredients used. The right combination of ingredients can make a significant difference in the texture, flavor, and overall quality of your homemade bread.
Choosing the Right Flour for Texture
The type of flour used is fundamental to the texture of your bread. King Arthur Unbleached All-Purpose Flour is often recommended for bread machines due to its consistent performance and high quality. Bread flour, with its higher protein content, can produce a chewier loaf, while all-purpose flour provides a balanced texture.
For those looking to experiment, whole wheat flour can add a nutty flavor and denser texture. However, it’s essential to note that whole wheat flour absorbs more liquid than all-purpose flour, so adjustments may be necessary.

The Role of Yeast and Liquid Temperatures
Yeast is a critical ingredient in bread making, responsible for the fermentation process that makes bread rise. The temperature of the liquid ingredients can significantly affect yeast activity. Warm liquids between 100°F and 110°F can help activate yeast, while cold liquids can slow down the process.
It’s also important to use the right type of yeast. Instant yeast is commonly used in bread machines because it can be added directly to the dry ingredients and has a faster action.
Why Salt and Sugar Matter Beyond Flavor
Salt and sugar play roles beyond just flavoring your bread. Salt helps control yeast growth, strengthens gluten, and improves the texture of the bread. Sugar, on the other hand, feeds the yeast, promoting fermentation. However, too much sugar can make the bread overly browned or even inhibit yeast activity.
| Ingredient | Role in Bread Making | Tips for Use |
|---|---|---|
| Flour | Provides structure and texture | Choose high-quality flour suitable for bread machines |
| Yeast | Responsible for fermentation | Use instant yeast and ensure liquid temperatures are appropriate |
| Salt | Controls yeast growth and enhances flavor | Use the right amount to avoid inhibiting yeast activity |
| Sugar | Feeds yeast and browns crust | Avoid excessive sugar to prevent over-browning |
My Go-To Breadmaker Bread Recipe
After experimenting with numerous breadmaker recipes, I’ve settled on a go-to formula that yields consistently delicious results. This recipe has become a staple in my household, and I’m excited to share it with you.
Measuring Ingredients for Consistent Results
Accurate measurement of ingredients is crucial for achieving consistent results in bread making. I use a digital kitchen scale to measure ingredients by weight rather than volume, as this method is more precise.
| Ingredient | Weight (grams) | Volume (cups) |
|---|---|---|
| Bread Flour | 500g | 4 cups |
| Water | 350g | 1.5 cups |
| Yeast | 7g | 2 teaspoons |
| Salt | 10g | 1.75 teaspoons |
| Sugar | 20g | 2 tablespoons |
Using a digital scale ensures that my measurements are accurate, which is vital for the success of the recipe.
The Importance of Ingredient Order
The order in which ingredients are added to the bread machine can affect the final outcome. Generally, I place the liquid ingredients (water, oil) in the bread pan first, followed by the dry ingredients (flour, yeast, salt, sugar). This order helps in achieving a uniform dough.
To further enhance the quality of the bread, it’s essential to understand the role of each ingredient and how they interact. For instance, yeast requires a certain temperature and moisture level to activate properly, which is why the temperature of the water is crucial.
By following this recipe and paying attention to the details such as ingredient measurement and order, you’ll be able to produce a delicious loaf of bread that’s sure to please.
Step-by-Step Instructions for Success
The key to a perfect loaf lies in understanding the step-by-step process of using your bread machine. By following these simple steps, you can create delicious homemade bread that rivals store-bought loaves.
Preparing the Bread Pan
Before you start, make sure to prepare your bread pan by greasing it lightly with butter or cooking spray. This will prevent the dough from sticking to the pan and make it easier to remove the bread once it’s baked.
I always check the manufacturer’s instructions for specific guidance on preparing the bread pan, as some machines may have special requirements.
Selecting the Correct Cycle and Crust Setting
Choosing the right cycle and crust setting is crucial for achieving the perfect loaf. Most bread machines come with various settings for different types of bread, such as white, whole wheat, or sourdough.
I recommend selecting the basic or standard cycle for a classic breadmaker bread recipe. You can also adjust the crust setting to your liking, whether you prefer a light, medium, or dark crust.
Cooling and Storing Your Fresh Bread
Once your bread is baked, it’s essential to cool it properly to preserve its texture and flavor. I always remove the bread from the machine and let it cool on a wire rack for at least 30 minutes before slicing.
To keep your bread fresh for longer, store it in an airtight container or plastic bag at room temperature. You can also freeze your bread for up to 3 months and thaw it when you’re ready to enjoy it.
By following these step-by-step instructions, you can achieve success with your breadmaker bread recipe and enjoy delicious homemade bread whenever you want. Whether you’re a beginner or an experienced baker, using a bread machine is a great way to simplify the bread-making process and produce consistent results.
Troubleshooting Common Bread Machine Issues
Bread machine bread making is not without its challenges, but these are easily overcome with the right knowledge. Even with a straightforward process like using a bread machine for homemade breadmaker recipes, issues can arise that affect the final product.
Why Your Bread Might Collapse
A collapsed loaf can be disappointing, but it’s often due to simple issues like incorrect ingredient ratios or improper machine settings. As one expert notes, “Overmixing or using too much yeast can cause bread to rise too quickly and then collapse.” Ensuring that ingredients are measured accurately and that the machine is set correctly can prevent this.
Another reason for collapse could be the type of flour used. Using a flour that is too weak or has low protein content can result in a loaf that cannot hold its structure. Switching to a bread flour or a high-protein flour can help improve the loaf’s texture and prevent collapse.
Fixing Dense or Heavy Loaves
Dense or heavy loaves are often the result of inadequate kneading, incorrect ingredient ratios, or insufficient rising time. To combat this, ensure that your bread machine is kneading the dough properly and that you’re using the right balance of ingredients. As a general rule, using a higher ratio of yeast to flour can help improve the rise, but be cautious not to overdo it.
- Check the expiration date of your yeast to ensure it’s active.
- Verify that your machine’s kneading blade is working correctly.
- Consider adjusting your recipe to include more liquid or to use a different type of flour.
Dealing with Under-Baked Centers
Under-baked centers can be a problem, especially in larger loaves. This issue is often due to the bread machine not being able to cook the bread evenly. To address this, try adjusting the crust setting to a darker crust, which can help ensure the interior is baked properly. Additionally, checking that the bread pan is properly aligned and that the machine is clean and free of debris can improve performance.
“One of the most effective ways to ensure your bread is baked evenly is to check on it during the baking cycle and adjust as necessary,” says a seasoned bread maker. This might involve tenting the loaf or adjusting the machine settings for future bakes.
Tips for Achieving a Softer, Fluffier Texture
The secret to a tender crumb lies in understanding the role of ingredients and environmental factors in bread making. To achieve a softer, fluffier texture in your bread machine bread, it’s essential to consider a few key factors.
The Secret of Adding Fat
Adding fat, such as butter or oil, can significantly enhance the texture of your bread. Fat helps to tenderize the dough, resulting in a softer crumb. The type and amount of fat used can vary depending on the recipe and personal preference. For example, using a high-quality butter can add a richness and depth of flavor to your bread.
As one expert notes,
“The addition of fat is crucial in creating a tender and soft crumb. It’s not just about adding any fat, but choosing the right type and amount for your specific bread recipe.”
Using Milk Instead of Water
Using milk instead of water can also contribute to a softer, fluffier texture. Milk contains proteins and sugars that help to strengthen the dough and promote browning. The type of milk used can impact the flavor and texture of the bread, so it’s worth experimenting with different options to find the one that works best for you.
| Type of Milk | Effect on Bread Texture | Flavor Profile |
|---|---|---|
| Whole Milk | Tender and soft | Rich and creamy |
| Low-Fat Milk | Slightly denser than whole milk | Milder flavor |
| Non-Dairy Milk | Variable texture depending on type | Neutral or slightly sweet |
The Impact of Humidity on Dough
Humidity can also play a significant role in determining the texture of your bread. High humidity can lead to a denser, heavier loaf, while low humidity can result in a drier, crumblier texture. To combat this, some bakers recommend adding a splash of lemon juice to the dough, as it can help to create a lighter, airier texture.
By understanding the role of ingredients and environmental factors, you can take your bread machine bread to the next level and achieve a softer, fluffier texture that’s sure to impress.
Creative Variations and Add-ins
I love using my bread machine to try out new breadmaker bread recipe ideas, from classic recipes with a twist to entirely new creations. The ability to experiment with various ingredients and add-ins is one of the joys of bread making.
Incorporating Herbs and Spices
Adding herbs and spices is a great way to give your bread a unique flavor. For example, you can add dried rosemary and garlic for a savory loaf or cinnamon and raisins for a sweet treat. When using herbs, start with a small amount, such as a teaspoon, and adjust to taste.
Some popular herbs and spices for bread include:
- Rosemary and garlic for a classic Italian flavor
- Cinnamon and raisins for a sweet, breakfast-inspired loaf
- Dried oregano and thyme for a Mediterranean twist
Adding Seeds, Nuts, and Dried Fruits
Seeds, nuts, and dried fruits not only add flavor but also texture to your bread. You can add them directly to the bread pan with the other ingredients. Some popular options include:
- Sunflower seeds for a nutty flavor
- Walnuts or almonds for added crunch
- Cranberries or cherries for a fruity twist
When adding these ingredients, keep in mind that they can affect the dough’s consistency. For example, adding too many nuts can make the dough dense.
Experimenting with Different Flour Blends
You can also experiment with different types of flour to create unique bread recipes. For instance, swapping out up to half a cup of bread flour for whole wheat flour can add depth and nutrition to your loaf.
| Flour Type | Effect on Bread |
|---|---|
| Bread Flour | Produces a light, airy texture |
| Whole Wheat Flour | Adds density and nutrition |
| All-Purpose Flour | A versatile option for a balanced texture |
By experimenting with different flour blends and add-ins, you can create a wide variety of delicious breadmaker recipes that suit your taste preferences.
Maintaining Your Bread Machine for Longevity
Maintaining your bread machine is crucial for its longevity and performance. A well-cared-for machine not only ensures that your bread turns out perfectly every time but also extends the lifespan of the appliance. In my experience, a little regular maintenance goes a long way in preventing issues and keeping your bread machine in top working order.
Cleaning the Pan and Kneading Paddle
One of the most critical aspects of maintaining your bread machine is cleaning the pan and kneading paddle after each use. Residual dough and flour can harden and become difficult to remove if left overnight, potentially affecting the machine’s performance and the quality of your bread. To clean, simply wash the pan and paddle with warm, soapy water, and dry them thoroughly before reassembling.
A soft brush can be helpful for removing any stubborn dough bits, especially from the kneading paddle’s nooks and crannies. For tougher residue, a mixture of baking soda and water can be used to soak the parts before cleaning.
Storing Your Machine Properly
Proper storage of your bread machine when not in use is also vital. Ensure the machine is completely dry before storing it to prevent any moisture buildup that could lead to mold or rust. Store the bread machine in a dry, cool place, away from direct sunlight.
It’s also a good idea to store the instruction manual and any accessories in a safe place where they won’t get lost. This way, you’ll have everything you need at your fingertips whenever you decide to try a new quick breadmaker recipe or experiment with different ingredients.
By following these simple maintenance tips, you can enjoy delicious homemade bread from your bread machine for years to come. Regular cleaning and proper storage are key to maintaining your appliance’s performance and ensuring it remains a valuable tool in your kitchen.
Conclusion
As we’ve explored throughout this guide, making delicious homemade bread with a bread machine is easier than you think. By understanding the essential ingredients, following a simple breadmaker bread recipe, and troubleshooting common issues, you can achieve professional-quality loaves in the comfort of your own kitchen.
With the tips and techniques provided, you’re now equipped to experiment with various homemade breadmaker recipes and creative variations. Whether you’re a seasoned baker or just starting out, the world of bread making is full of possibilities.
I encourage you to start your bread-making journey today and discover the joy of freshly baked bread, straight from your oven. Try out different recipes, add your favorite ingredients, and enjoy the satisfaction of creating something truly special.