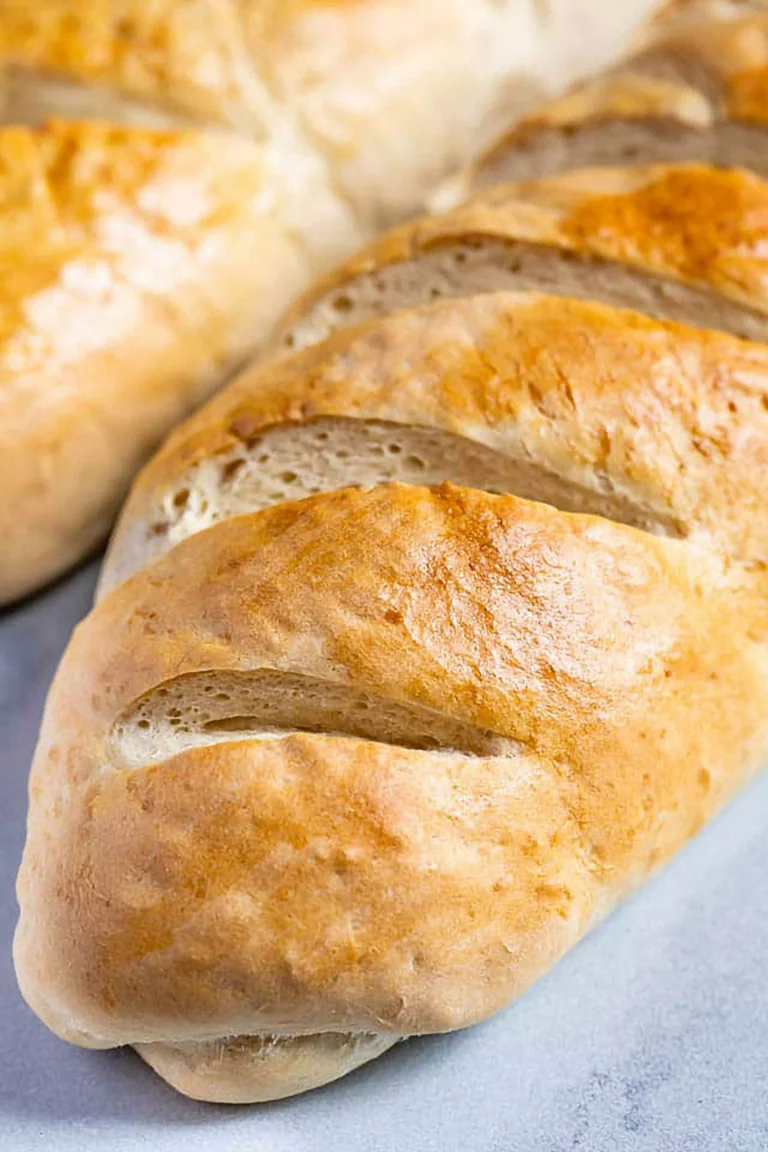
Moroccan White Bread Recipe: Soft and Fluffy Traditional Khobz
There is something deeply comforting about the smell of fresh dough rising in a warm kitchen. I still remember the first time I tasted authentic, homemade goodness pulled straight from a hot oven. It felt like a warm hug on a cold afternoon.
Thank you for reading this post, don't forget to subscribe!My goal is to help you recreate that same magic at home. By following this morrocan white bread recipe, you will learn how to master the art of baking. You do not need professional skills to achieve a perfect, golden crust.
We will walk through every step together, from choosing the right flour to kneading the dough until it is perfectly smooth. Soon, you will be serving traditional khobz that is incredibly soft and flavorful. Let us bring the heart of a Mediterranean home into your own space today.
Table of Contents
The Cultural Significance of Moroccan Khobz
When I sit down to eat in a Moroccan home, the first thing I notice is the warm, round loaf waiting on the table. It is never an afterthought; it is the centerpiece of the entire dining experience. This traditional khobz serves as both a staple food and a primary utensil for every meal.
Why Khobz is the Heart of the Moroccan Table
In Moroccan cuisine, bread acts as the bridge between the diner and the dish. Whether I am scooping up a rich, slow-cooked tagine or dipping into a vibrant bowl of zaalouk, the bread is essential. It provides a satisfying texture that balances the complex spices found in local recipes.
Many people view homemade bread as a labor of love that defines the household. It represents the patience and care required to sustain a family. Without this humble loaf, the table would feel incomplete and the meal would lose its authentic character.
The Role of Bread in Daily Hospitality
Sharing a meal is the ultimate expression of Moroccan hospitality. When a host breaks bread with a guest, they are offering a piece of their home and their culture. This simple act creates an immediate bond that transcends language barriers.
I have found that the warmth of homemade bread mirrors the warmth of the people I meet. It is a symbol of generosity that invites everyone to gather, share, and connect. By mastering the art of traditional khobz, you are not just baking; you are participating in a beautiful, centuries-old tradition of welcoming others into your life through the joy of Moroccan cuisine.
Essential Ingredients for Your Moroccan White Bread Recipe
When I set out to master a morrocan white bread recipe, I quickly learned that ingredient quality is the secret to success. You do not need a long list of complicated items to achieve professional results at home. Instead, focusing on the purity and freshness of your staples will elevate your baking to a new level.
Quality Flour Choices for the Best Crumb
The foundation of any great loaf is the flour you choose. I always recommend using high-protein bread flour to ensure the structure is strong enough to hold air bubbles during fermentation. This choice is vital if you want to achieve that signature soft crumb that makes the bread so irresistible.
For a more authentic touch, I love to incorporate a small amount of semolina flour into my dough. This addition provides a subtle, rustic texture and a beautiful golden hue that distinguishes traditional loaves from standard white bread. It adds a slight crunch to the crust while keeping the interior light and airy.
The Role of Yeast and Salt in Traditional Baking
Yeast acts as the engine of your bread, driving the rise and creating those delicate air pockets. Without fresh, active yeast, your dough will remain dense and flat. I treat my yeast with care, ensuring it is stored properly so it remains potent for every bake.
Salt is equally important, as it does more than just enhance the flavor of the finished loaf. It regulates the fermentation process, preventing the yeast from working too quickly and ensuring a balanced rise. When these ingredients work in harmony, you get a loaf that tastes as good as it looks.
| Ingredient | Primary Function | Impact on Texture |
|---|---|---|
| Bread Flour | Structure | Chewy and soft |
| Semolina Flour | Flavor/Color | Rustic and firm |
| Active Yeast | Leavening | Light and airy |
| Sea Salt | Flavor/Control | Balanced crumb |
Selecting the Right Flour and Yeast
I believe that the secret to a great loaf of homemade bread lies in the quality of your flour and yeast. When you start with the right components, you build a solid foundation for a successful bake. Taking the time to understand these basics will make your time in the kitchen much more rewarding.
Understanding Protein Content in Bread Flour
The protein content in your flour is the primary driver of gluten development. I often recommend using bread flour because its higher protein levels create a strong, elastic structure that holds air bubbles effectively. This results in a chewy, satisfying crumb that defines a traditional loaf.
While all-purpose flour is a common pantry staple, it may lack the strength needed for a perfect rise. I personally enjoy adding a portion of semolina flour to my mix. This addition provides a beautiful golden hue and a distinct, nutty flavor that elevates the final product.
Choosing Between Active Dry and Instant Yeast
Yeast is the engine of your dough, so choosing the right type is essential for a consistent rise. Active dry yeast requires a brief soak in warm water to wake up before you mix it with your dry ingredients. This step allows you to verify that your yeast is alive and ready to work.
On the other hand, instant yeast can be mixed directly into your flour without any prior activation. It is incredibly convenient for those who want to streamline their baking process. Regardless of the type you choose, always check the expiration date to ensure your dough will rise properly.
| Ingredient Type | Primary Benefit | Best Use Case |
|---|---|---|
| Bread Flour | High Protein | Chewy, structured loaves |
| Semolina Flour | Texture & Color | Authentic, rustic crusts |
| Active Dry Yeast | Reliability Check | Traditional, slow-rise recipes |
| Instant Yeast | Speed & Ease | Quick, efficient baking |
Preparing the Dough for Optimal Texture
I find that the secret to a professional-quality loaf lies entirely in how you prepare your dough. When you treat the initial mixing stage with patience, you set the stage for a successful bake. This process is where you transform simple pantry staples into a beautiful, elastic yeast dough.
Mixing the Ingredients for a Smooth Consistency
To achieve the best results, I always start by combining my dry ingredients before slowly introducing the liquid. Using high-quality bread flour is essential because its protein content provides the structure needed for a sturdy yet light loaf. I mix the ingredients until they just come together, ensuring no dry pockets of flour remain in the bowl.
Hydration Levels and Why They Matter
Achieving the right hydration level is the primary factor in creating a soft crumb. If the dough is too dry, the bread will turn out dense and heavy. Conversely, adding water slowly allows the flour to absorb moisture fully, which is the key to a light and airy texture.
Adjusting for Humidity in Your Kitchen
I have learned that environmental factors play a significant role in baking. If your kitchen is particularly humid, the flour may already contain more moisture than usual. In these cases, you might need to add a little extra bread flour to keep the dough manageable and prevent it from becoming too sticky.
Mastering this balance is what separates a basic loaf from a truly traditional khobz. By paying attention to the feel of your yeast dough, you can ensure a consistent, soft crumb every time you bake. Trust your hands to tell you when the consistency is just right.
Mastering the Traditional Kneading Technique
Transforming your shaggy dough into a smooth, elastic masterpiece is the most rewarding part of baking. This physical process is where the magic happens, turning simple ingredients into a cohesive structure. By focusing on your kneading technique, you ensure that your bread develops the strength needed for a beautiful rise.
The Push and Fold Method Explained
I find that the push and fold method is the most effective way to build gluten. Start by pushing the dough away from you with the heel of your hand, stretching it across the counter. Then, fold the dough back over itself and give it a slight turn.
Repeat this motion consistently to create a rhythm. This rhythmic movement helps align the gluten strands, which is vital for a soft and fluffy crumb. You will notice the dough becoming less sticky and more manageable as you continue this specific kneading technique.
How to Tell When the Dough is Properly Developed
Knowing when to stop can be tricky for beginners, but your dough will give you clear signs. A properly developed dough should feel smooth, supple, and slightly tacky rather than sticky. When you poke it gently with your finger, the indentation should spring back quickly.
If the dough still feels shaggy or tears easily, it needs more time under your hands. Consistent effort with your kneading technique will eventually result in a ball that holds its shape perfectly. Once it reaches this stage, it is ready for the first rise.
The Windowpane Test for Gluten Strength
To be absolutely sure your dough is ready, I recommend performing the windowpane test. Take a small piece of dough and gently stretch it out between your fingers. If you have developed enough gluten, the dough will stretch into a thin, translucent membrane without tearing.
If light passes through the center like a windowpane, your gluten structure is strong and ready for baking. If it tears immediately, simply continue your kneading technique for a few more minutes. This simple test is the best way to guarantee professional results in your own kitchen.
The Importance of the First Rise
Bulk fermentation is the secret step that transforms simple ingredients into a masterpiece. During this phase, the yeast dough undergoes a vital transformation that builds both flavor and structure. I believe that patience during this stage is the key to achieving a professional-quality loaf at home.

Creating the Perfect Environment for Fermentation
To get the best results, you must provide a cozy space for your bread to grow. I always place my dough in a lightly oiled bowl to prevent sticking and cover it with a warm, damp towel. This simple setup keeps the surface from drying out while maintaining the steady temperature needed for active proofing.
Avoid drafty areas in your kitchen, as cold air can slow down the process significantly. A spot inside a turned-off oven with the light on is often the perfect sanctuary for your dough. This consistent warmth allows the yeast to work efficiently, ensuring your bread develops a complex and delicious flavor profile.
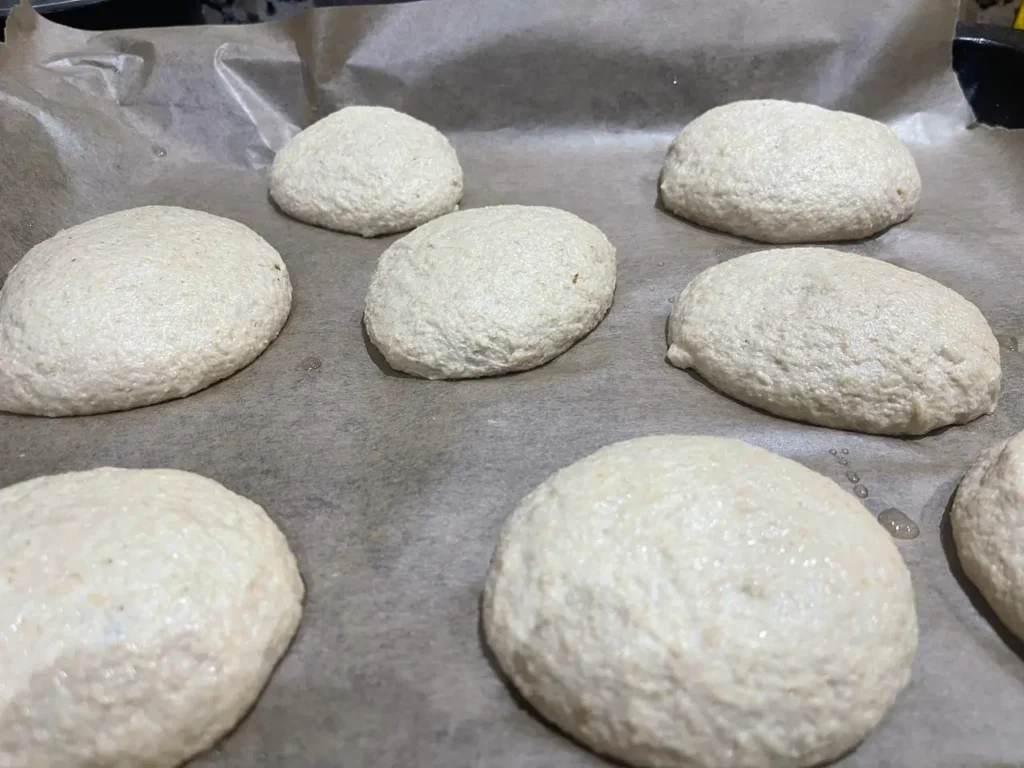
Signs That Your Dough Has Doubled in Size
Knowing when the first rise is complete is a skill that improves with practice. You are looking for specific visual and physical cues that indicate the fermentation is finished. Keep an eye out for these indicators:
- The dough has visibly expanded to roughly twice its original volume.
- The surface looks smooth and feels light and airy when gently pressed.
- A light indentation remains when you poke the dough with a floured finger.
If the dough springs back too quickly, it likely needs a little more time for proper proofing. Once it reaches that perfect, pillowy state, you are ready to move on to the next stage of shaping. Trust your senses, and remember that a well-rested yeast dough is the foundation of a truly great Moroccan Khobz.
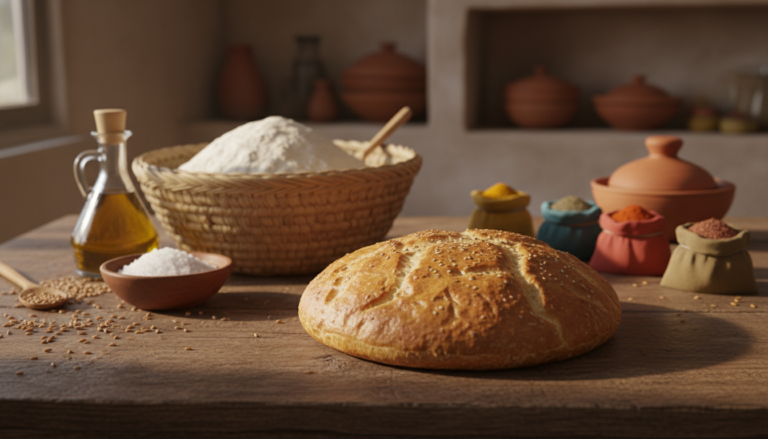
Shaping Your Khobz into Perfect Rounds
Shaping your dough is a rewarding step that transforms a simple mass into the beautiful, rustic loaves you expect from a traditional khobz recipe. This stage is where the bread begins to take on its final, recognizable form. I always approach this part with patience, as it sets the foundation for a perfect bake.
Techniques for Creating Surface Tension
To achieve that signature look, I focus on building surface tension across the top of the dough. I gently tuck the edges of the dough underneath itself, rotating the ball until the top feels smooth and taut. This simple action prevents the loaf from spreading too thin or losing its shape while it rests.
Building this tension is vital for a traditional khobz because it encourages the bread to rise upward rather than outward. If the surface is loose, the loaf may become flat and dense. By keeping the skin tight, I ensure the crumb remains light and airy.
Flattening the Dough for the Classic Khobz Shape
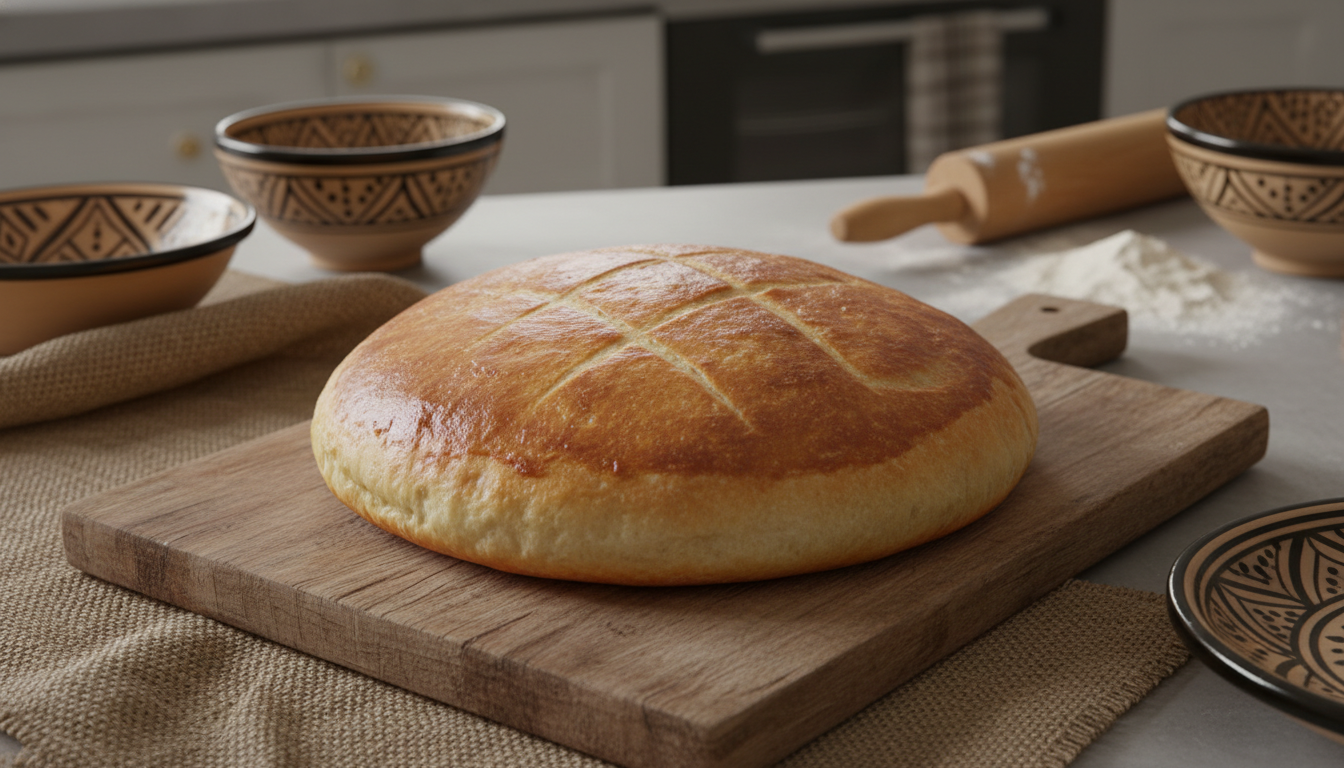
Once I have formed a smooth, tight ball, I let it rest briefly before the final flattening. I use the palm of my hand to press down gently, working from the center outward to maintain an even thickness. The goal is to create a flat, round disc that is roughly one inch thick, which is the hallmark of traditional khobz.
I take care not to deflate the dough too much during this process, as I want to preserve the air bubbles created during the first rise. A gentle touch ensures the bread maintains its rustic charm and soft texture. The following table highlights the key characteristics I look for during the shaping process.
| Feature | Goal | Benefit |
|---|---|---|
| Surface Tension | Smooth and Taut | Better oven spring |
| Dough Thickness | One Inch | Even baking |
| Shape | Uniform Round | Consistent texture |
The Second Rise and Scoring the Bread
Once your dough is shaped, the journey toward a perfect loaf enters its final, most delicate phase. This period of proofing is not just a waiting game; it is the moment your bread gains its signature structure and volume. I always ensure my shaped loaves are tucked away in a warm, draft-free spot to reach their full potential.
Why the Final Proof is Crucial for Fluffiness
The final proofing stage is essential for achieving that light, airy crumb we all love in traditional bread. During this time, the yeast continues to ferment, creating tiny gas bubbles that expand the dough. If you rush this step, your bread will likely turn out dense and heavy.
To keep the surface from drying out, I cover my loaves with a clean, slightly damp kitchen towel. This simple habit creates a humid micro-environment that allows the dough to rise evenly without forming a tough skin. Consistency is key when you want to replicate that professional, bakery-style finish at home.
“The secret to a perfect loaf lies in the patience of the baker during the final rise; never rush the process if you want the best results.”
Scoring Patterns and Their Traditional Meaning
Before the bread enters the oven, I perform the traditional act of scoring the tops. This is more than just a decorative touch; it is a functional necessity. Scoring allows the bread to expand in a controlled way, preventing it from bursting at the sides during the initial heat of the oven.
In many households, specific patterns are used to identify the bread or simply to honor heritage. Here are a few common ways to score your loaves:
- The Cross: A classic design that represents a blessing on the bread.
- Radial Lines: These help the loaf expand uniformly in all directions.
- Parallel Slashes: A simple, elegant look that creates a beautiful crust ridge.
By mastering the art of proofing and intentional scoring, you elevate your baking from a simple chore to a rewarding craft. These final steps ensure that every loaf you pull from the oven is as beautiful as it is delicious.
Baking Methods for a Golden Crust
I find that the secret to a professional-looking loaf lies entirely in how you manage your oven environment. Achieving the ideal texture requires a balance of heat and timing to ensure your bread develops that signature golden color.
Using a Conventional Oven for Authentic Results
To get the best results in a standard home kitchen, you must prioritize a high oven temperature. Most traditional recipes thrive when the heat is intense enough to cause a rapid rise, known as oven spring, before the crust sets.
I recommend preheating your oven for at least thirty minutes before baking. This ensures the walls of the oven are fully saturated with heat, which is essential for creating crusty bread that stays soft on the inside.
The Benefits of Using a Baking Stone or Steel
If you want to elevate your baking game, investing in a baking stone or steel is a game-changer. These tools act as a thermal battery, absorbing heat and releasing it directly into the bottom of your dough.
- Even Heat Distribution: Prevents hot spots that can lead to uneven baking.
- Superior Crust: Provides the intense contact heat needed for a crisp bottom.
- Consistent Results: Helps maintain a steady oven temperature even when the door is opened.
Managing Oven Steam for a Better Crust
Adding steam to your oven is a pro technique that helps your bread expand fully. By keeping the surface of the dough moist, you allow it to stretch longer before the crust hardens, resulting in a lighter, airier crumb.
You can easily create steam by placing a shallow pan of hot water on the bottom rack during the first few minutes of baking. This simple trick is the secret to achieving that professional, crusty bread finish that everyone loves. Always monitor the color of your loaf and listen for a hollow sound when tapped to ensure it is perfectly baked.
Troubleshooting Common Baking Issues
I have learned that even small adjustments can turn a flat loaf into a masterpiece. Even experienced bakers encounter hurdles, but most problems are easy to solve with a few simple baking tips. Understanding how your dough behaves is the first step toward consistent success in your kitchen.
Fixing Dense or Heavy Bread
If your finished loaf feels too dense, it often means the dough lacked enough air or was not kneaded long enough. Proper kneading develops the gluten structure necessary to trap gas bubbles during fermentation. Always ensure your flour is fresh, as old flour can lose its ability to create a light, airy crumb.
Another common cause is adding too much flour during the shaping process. I recommend using only a light dusting on your work surface to keep the dough hydrated. This helps you achieve that signature crusty bread texture that everyone loves.
What to Do If Your Dough Does Not Rise
A dough that refuses to rise is usually a sign that your yeast was inactive or the environment was too cold. Yeast is a living organism that thrives in warm, draft-free spaces. If your kitchen is chilly, try placing your bowl inside a turned-off oven with a pan of warm water nearby.
You should also check the expiration date on your yeast packets before you begin. If the yeast does not bubble or foam when mixed with warm water, it is likely dead and will not produce the lift you need. Starting with fresh ingredients is one of the most important baking tips for success.
Preventing Burnt Bottoms and Pale Tops
If you struggle with burnt bottoms, your oven rack might be positioned too close to the heating element. I suggest moving your rack to the center or middle-upper position to allow for better heat circulation. Using a double-pan method, where you stack two baking sheets together, can also insulate the bottom of your loaf.
For those dealing with pale tops, ensure your oven is fully preheated before the bread goes inside. A hot environment is essential for achieving a beautiful, golden-brown finish on your crusty bread. You can also lightly mist the oven with water to create steam, which promotes a better crust color.
| Issue | Primary Cause | Quick Fix |
|---|---|---|
| Dense Crumb | Under-kneading | Increase kneading time |
| No Rise | Inactive Yeast | Check water temperature |
| Burnt Bottom | Rack too low | Use double baking sheet |
| Pale Crust | Low oven heat | Preheat stone longer |
Serving Suggestions and Storage Tips
Serving your fresh loaf is the most rewarding part of the entire baking journey. The golden crust and soft interior provide the perfect canvas for a variety of traditional meals.
Pairing Khobz with Tagines and Dips
Authentic Moroccan cuisine relies on bread as a primary utensil. You can use pieces of your warm loaf to scoop up savory stews or rich sauces.
Consider these classic pairings to elevate your dining experience:
- Lamb or chicken tagines with preserved lemons and olives.
- Creamy zaalouk, a smoky eggplant and tomato dip.
- Spicy harissa mixed with olive oil for a simple starter.
- Fresh cucumber and tomato salads served with a light vinaigrette.
How to Keep Your Bread Fresh for Days
Proper bread storage is essential to maintain the quality of your homemade creation. I find that keeping the loaf in a cool, dry place is the best way to prevent moisture loss.
For short-term needs, wrap the bread in a clean cotton kitchen towel. This allows the crust to breathe while keeping the crumb soft. If you need to keep it for more than two days, consider using a dedicated bread box to regulate humidity.
Reheating Techniques to Restore Softness
If your bread feels a bit firm after a day or two, do not worry. You can easily restore that fresh-baked texture with a few simple steps.
I recommend lightly misting the crust with water before placing it in a preheated oven at 350°F for about five minutes. This quick refresh makes the bread taste as if it just came out of the oven. For longer-term bread storage, freezing is a fantastic option that preserves the flavor of your Moroccan cuisine staples for weeks.
Conclusion
Baking your own loaf is a rewarding experience that connects you to the rich traditions of Moroccan culture. By following this morrocan white bread recipe, you have gained the essential skills to create a traditional khobz that elevates any meal.
Mastering the art of homemade bread takes patience and curiosity. Do not feel discouraged if your first attempt does not look like a professional bakery loaf. Every baker starts somewhere, and your unique touch makes the process special.
Use these baking tips to refine your technique over time. Experiment with different flour brands like King Arthur or Bob’s Red Mill to see how they change your results. Small adjustments often lead to the best textures.
I encourage you to share your fresh bread with friends and family. Food tastes better when enjoyed in good company. Let me know how your kitchen smells once that golden crust comes out of the oven.