How to Store Homemade Bread Properly for Maximum Freshness
There is nothing quite like the warm, comforting aroma of a fresh loaf cooling on my kitchen counter. I pour so much heart into kneading and proofing, only to feel a pang of sadness when the crust turns tough or the crumb dries out just a day later. Finding the best way to store homemade bread is essential for preserving that artisan quality we all crave.
Thank you for reading this post, don't forget to subscribe!I have learned that the secret often lies in the fermentation process. For instance, sourdough loaves naturally last longer than those made with commercial yeast because the lactic acid bacteria create an acidic environment that resists staling. Understanding these simple scientific principles allows me to enjoy my labor of love for much longer.
In this guide, I will share practical techniques to help you avoid common pitfalls. By mastering these habits, you can ensure your kitchen creations remain delicious and soft from the first slice to the very last.
Table of Contents
Understanding the Science of Bread Staling
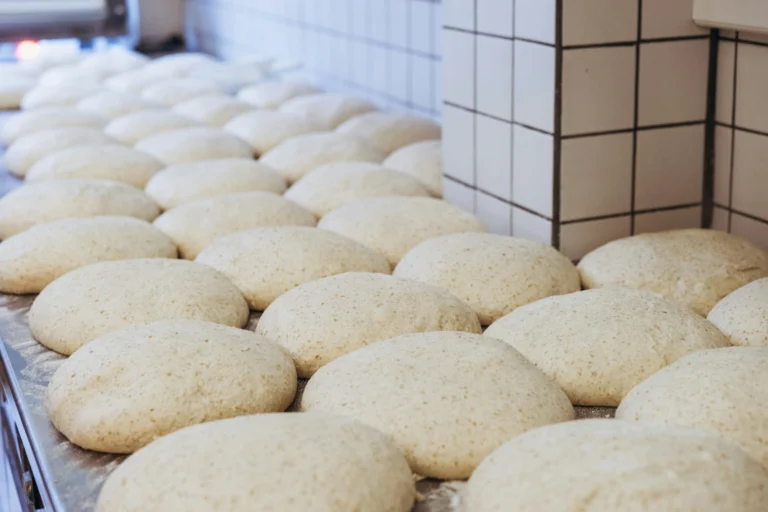
The secret to keeping bread fresh lies in the microscopic changes that occur the moment it leaves the oven. As a baker, I have learned that the transition from a soft, warm loaf to a stale one is not just about drying out. It is a complex chemical process that dictates the homemade bread shelf life.

Why Homemade Bread Dries Out Faster
Most commercial breads contain additives and preservatives designed to slow down moisture loss. Because I prefer baking without these chemicals, my loaves naturally have a shorter window of peak quality. Moisture constantly migrates from the center of the bread toward the crust and eventually into the surrounding air.
This evaporation process is the primary reason why homemade bread shelf life is significantly shorter than store-bought alternatives. Without proper storage, the crumb loses its elasticity and becomes brittle. Learning how to keep bread fresh longer requires me to manage this moisture loss effectively.
The Role of Starch Retrogradation
Beyond simple evaporation, the internal structure of the bread undergoes a process called starch retrogradation. During baking, starch granules absorb water and swell, creating a soft texture. As the loaf cools, these starch molecules, specifically amylopectin, begin to re-order themselves into a rigid, crystalline structure.
This crystallization is what makes the crumb feel hard and gritty over time. Even if the bread is kept in a sealed container, this molecular hardening continues to occur. Understanding this phenomenon helps me realize that temperature control is just as vital as moisture retention.
| Factor | Impact on Freshness | Management Strategy |
|---|---|---|
| Moisture Loss | High (Causes dryness) | Use airtight containers |
| Starch Retrogradation | High (Causes hardening) | Avoid cold temperatures |
| Ambient Humidity | Medium (Affects crust) | Adjust storage environment |
The Best Way to Store Homemade Bread for Short-Term Freshness
Mastering the art of bread preservation starts with understanding how your kitchen environment affects the crumb. Many home bakers mistakenly believe that the refrigerator is the safest place for their loaves. However, I have found that the best way to store homemade bread for short-term consumption is simply keeping it at room temperature.

Choosing the Right Environment
To maintain the perfect texture, you must prioritize a location that offers stable conditions. Avoid areas near windows or appliances that generate heat, as these can cause rapid moisture loss. Instead, look for a cool, dry spot in your pantry or a dedicated bread box that allows for minimal airflow.
“Bread is a living thing, and it needs to breathe to maintain its character and flavor profile.”
If you seal your bread in an airtight container, you risk trapping too much moisture, which can lead to a soggy crust. Conversely, leaving it completely exposed will cause the loaf to dry out within hours. Finding the middle ground is the secret to success.
The Importance of Room Temperature
I always recommend keeping your bread at room temperature if you plan to finish the loaf within two to three days. Temperatures between 65°F and 70°F are generally considered the optimal bread storage conditions for most artisan loaves. This range prevents the starch molecules from recrystallizing too quickly, which is what happens inside a cold refrigerator.
When you store bread in the fridge, you accelerate the staling process significantly. The cool air pulls moisture from the center of the loaf, resulting in a tough, unappealing texture. By keeping your bread on the counter, you ensure that the crumb remains soft and the crust stays exactly as you intended.
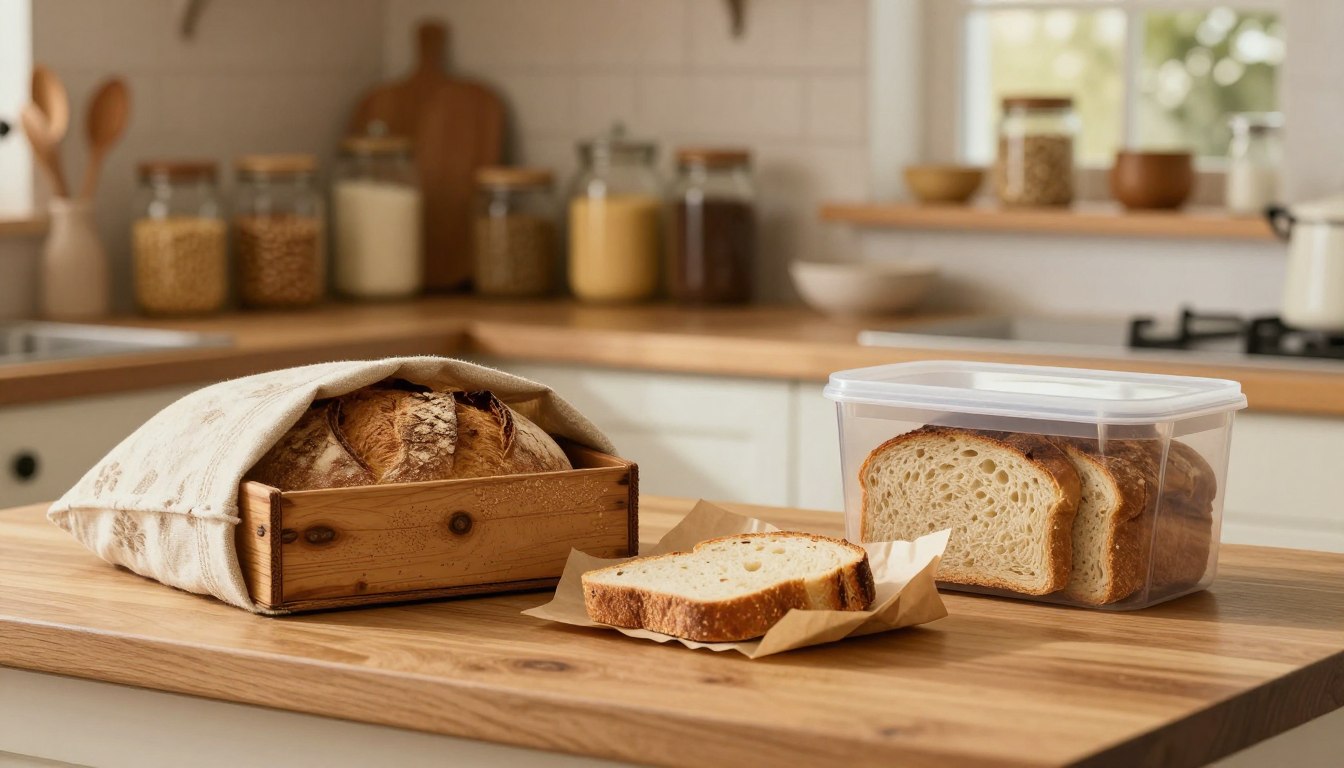
Essential Tools and Containers for Bread Storage
I have found that the secret to perfect bread lies in the tools you choose for storage. Selecting the right gear is vital for maintaining the texture and flavor of your hard work. By using the right bread storage containers, you can significantly extend the life of your loaves.
Evaluating Bread Boxes and Their Benefits
A classic bread box is often the most reliable choice for many home bakers. These containers provide a stable environment that balances airflow and humidity. They are particularly effective at keeping the crust from becoming too soft while preventing the interior from drying out prematurely.
When you invest in a quality box, you are creating a micro-climate for your baked goods. I recommend looking for models that offer adjustable ventilation. These homemade bread storage tips will help you maintain the ideal balance for your specific kitchen environment.
Using Paper Bags Versus Plastic Bags
Choosing between paper and plastic often depends on the type of bread you have just pulled from the oven. Each material interacts with moisture in a very different way. Understanding these differences is key to mastering your daily routine.
When to Use Breathable Paper
Paper bags are the gold standard for crusty loaves like sourdough or baguettes. Because paper is porous, it allows the bread to breathe and prevents the crust from becoming soggy. This simple method ensures that your artisan loaves retain their signature crunch for as long as possible.
When to Use Airtight Plastic
Plastic bags are best reserved for soft sandwich breads or enriched doughs like brioche. These loaves contain more fat and sugar, which makes them prone to drying out quickly. An airtight seal traps the natural moisture inside, keeping the crumb soft and tender for several days. Following these homemade bread storage tips will ensure your soft loaves stay fresh and delicious.
Step-by-Step Guide to Cooling Bread Before Storage
If you want to extend your homemade bread shelf life, you must master the art of cooling. Many bakers feel tempted to slice into a loaf the moment it leaves the oven, but this often leads to disappointment. Allowing your bread to rest properly is the final, essential step in the baking process.
Why You Must Wait for Complete Cooling
When bread exits the oven, the internal structure is still delicate and actively setting. Slicing a warm loaf too early causes the starches to collapse, resulting in a gummy and sticky interior that ruins the eating experience. By waiting, you allow the moisture to redistribute evenly throughout the crumb.
This stabilization process is vital for maintaining the integrity of your loaf. If you cut too soon, you lose precious steam that should have stayed inside to keep the bread soft. Proper cooling ensures that your homemade bread shelf life is maximized by preventing premature drying or structural failure.

The Dangers of Trapping Steam
Never place a warm loaf into a plastic bag or an airtight container. Trapping steam creates a humid environment that turns a crisp, golden crust into a soft, leathery mess. This excess moisture also encourages mold growth, which significantly shortens your homemade bread shelf life.
Instead, place your loaf on a wire rack to ensure air circulates around all sides. This crucial airflow allows the crust to remain firm while the interior finishes its cooling cycle. Use the following guide to determine how long your specific type of bread needs to rest before you consider it ready for storage.
| Bread Type | Minimum Cooling Time | Storage Recommendation |
|---|---|---|
| Artisan Sourdough | 3 to 4 Hours | Paper bag or bread box |
| Soft Sandwich Loaf | 2 Hours | Plastic bag after cooling |
| Enriched Brioche | 1.5 Hours | Wrapped in wax paper |
By following these cooling guidelines, you protect the quality of your hard work. Proper temperature management is the foundation of a long homemade bread shelf life and ensures every slice tastes as fresh as the first.
Managing Humidity and Airflow for Artisan Loaves
When it comes to storing artisan bread at home, the balance of air and moisture is everything. I have learned that artisan loaves require a different approach than standard sandwich bread because of their thick, crackly crusts. If you seal them too tightly, the crust softens; if you leave them completely exposed, the interior turns into a rock.
Preserving the Crust Texture
To keep that signature crunch, you must allow the bread to breathe while protecting the soft crumb inside. I recommend keeping a cut loaf cut-side-down directly on a wooden cutting board. This simple technique creates a natural seal that keeps the interior moist while leaving the crust exposed to the air.
By using the crust as a natural barrier, you prevent the loaf from drying out too quickly. Avoid wrapping the entire loaf in plastic, as this traps moisture and turns a crisp crust into a chewy, rubbery mess. Instead, focus on maintaining optimal bread storage conditions by keeping the loaf in a cool, dry spot away from direct airflow.
Preventing Mold Growth in Humid Climates
Living in a humid environment presents a unique challenge for bread lovers. High moisture levels in the air can encourage mold growth much faster than in arid regions. If you notice your kitchen feels damp, you should avoid leaving bread on the counter for more than a day.
In these climates, I suggest moving your bread to a breathable paper bag or a dedicated bread box that allows for proper ventilation. These tools help maintain optimal bread storage conditions by preventing the buildup of excess humidity. If the air remains heavy with moisture, consider freezing your artisan loaves sooner to ensure they stay fresh and safe to eat.
Freezing Homemade Bread for Long-Term Preservation
Freezing is the ultimate secret for preserving homemade bread over long periods. When I bake a large batch, I rely on my freezer to lock in moisture and flavor, ensuring that every slice tastes as fresh as the day it left my oven.
Preparing Your Loaf for the Freezer
Before I place any loaf into the freezer, I make sure it is completely cool. If I freeze a warm loaf, condensation will form inside the packaging, leading to unwanted ice crystals and a soggy crust upon thawing.
I personally prefer to slice my bread before freezing it. This allows me to take out only what I need for a quick snack or breakfast, which I can then reheat instantly in my toaster.
The Proper Way to Wrap for Maximum Protection
Proper wrapping is essential to prevent freezer burn, which can ruin the texture of your crust. I always aim for an airtight seal to keep the environment inside the freezer from drying out the crumb.
Using Plastic Wrap and Aluminum Foil
My go-to method involves a two-layer approach for maximum protection. First, I wrap the bread tightly in plastic wrap to create a moisture barrier. Then, I add a second layer of heavy-duty aluminum foil to shield the loaf from the harsh, cold air of the freezer.
Labeling and Dating Your Frozen Bread
It is easy to forget how long a loaf has been sitting in the back of the freezer. I always use a permanent marker to write the date on a piece of masking tape attached to the foil. This simple habit helps me keep track of my inventory and ensures I use the oldest loaves first.
| Storage Method | Shelf Life | Best For |
|---|---|---|
| Countertop | 2-3 Days | Immediate consumption |
| Bread Box | 3-5 Days | Artisan crust maintenance |
| Freezer | 3 Months | Long-term preserving homemade bread |
Thawing and Refreshing Frozen Bread
Even after weeks in the freezer, your homemade bread can taste like it just came out of the oven. Mastering the transition from a frozen state to a warm, crusty loaf is a vital skill for anyone interested in how to keep bread fresh longer. With the right approach, you can easily avoid the dreaded soggy texture that often ruins thawed baked goods.
Safe Thawing Techniques
The most reliable way to thaw a whole loaf is to let it sit at room temperature while still in its original packaging. This slow process allows the moisture to redistribute evenly throughout the crumb, preventing the bread from becoming dry or brittle. Patience is truly your best friend when you want to maintain the quality of your hard work.
If you are in a hurry, you can thaw individual slices directly in your toaster. This method is perfect for busy mornings when you need a quick breakfast. Just be sure to use a low heat setting to ensure the center thaws before the outside burns.
Reviving the Crust in the Oven
Once your bread is thawed, you might notice the crust has lost its signature crunch. You can easily fix this by placing the loaf in a preheated oven at 350°F for about five to ten minutes. Reheating the bread to an internal temperature of 140°F (60°C) is the scientific sweet spot that temporarily reverses the effects of staling.
This quick blast of heat works wonders to crisp up the exterior while keeping the inside soft and airy. It is a highly effective strategy for those learning how to keep bread fresh longer, as it restores the sensory experience of a freshly baked loaf. Always serve your bread immediately after this refreshing step for the best possible results.
Common Mistakes That Ruin Homemade Bread
Protecting your homemade bread requires more than just a good recipe; it demands smart storage habits. I have found that even the most dedicated bakers often overlook the environment where they keep their loaves. By following a few simple homemade bread storage tips, you can avoid the common pitfalls that lead to wasted effort and stale crusts.
The Pitfalls of Refrigeration
Many people mistakenly believe that the refrigerator is the safest place to keep bread fresh. In reality, the cold environment of a fridge is one of the fastest ways to ruin your loaf. The chilled air pulls moisture out of the crumb, which significantly accelerates the staling process.
When you store bread in the fridge, the starch molecules recrystallize much faster than they would at room temperature. This results in a dry, tough texture that is difficult to enjoy. If you want to keep your bread at its best, avoid the refrigerator at all costs.
Avoiding Direct Sunlight and Heat Sources
Another frequent error involves leaving bread in areas exposed to direct sunlight or near heat sources. Placing your loaf on a sunny countertop or next to a hot oven can cause the internal temperature of the bread to fluctuate. These conditions create an ideal environment for moisture loss and can even encourage premature mold growth.
I always recommend keeping your bread in a cool, dark, and dry location. Consistent temperatures are essential for maintaining the quality of your bake. By applying these homemade bread storage tips, you ensure that your hard work stays delicious for as long as possible.
Storing Different Types of Homemade Bread
Not every loaf of bread requires the same environment to stay fresh. When I bake at home, I find that the ingredients and the hydration level of the dough dictate how I should protect my finished product. Understanding these differences is the secret to storing artisan bread at home successfully.
Handling Sourdough and Crusty Artisan Loaves
Artisan loaves, especially sourdough, rely on a crisp, crackly crust for their signature appeal. If I seal these loaves in plastic, the moisture trapped inside will quickly turn that beautiful crust soft and chewy. Instead, I prefer to keep these breads in a paper bag or a dedicated bread box that allows for minimal airflow.
This controlled environment helps the crust maintain its texture while the interior crumb stays soft for a day or two. If the loaf is particularly large, I often store it cut-side down on a wooden cutting board. This simple trick helps prevent the exposed crumb from drying out too quickly.
Managing Soft Sandwich Breads and Enriched Doughs
Soft sandwich breads, such as milk bread or brioche, have a completely different set of needs. Because these doughs are enriched with butter, eggs, or milk, they tend to dry out faster than lean artisan loaves. I have found that beeswax wraps are an excellent solution for these types of bread.
The wax creates a gentle seal that locks in moisture without making the bread sweat. If I do not have a beeswax wrap, a high-quality plastic bag works well to keep the crumb tender. By adjusting my storage method based on the recipe, I ensure that every slice remains as delicious as the day it came out of the oven.
Troubleshooting Common Storage Issues
When your bread doesn’t behave as expected, it is time to troubleshoot your storage methods. I have learned that even the most carefully baked loaf can face challenges once it leaves the oven. By paying close attention to the texture and appearance of your bread, you can often save it or prevent future waste.
Identifying Signs of Spoilage
The most critical rule of bread safety is simple: if you see mold, throw it away. Any visible mold growth means the entire loaf is contaminated, even if the fuzzy spots are only on one slice. Spores often spread throughout the crumb long before they become visible to the naked eye.
Distinguishing between staleness and spoilage is also important. Stale bread feels hard or dry but remains safe to eat, often working perfectly for toast or breadcrumbs. If the bread smells sour, off, or feels slimy, it has likely spoiled and should be discarded immediately.
Dealing with Excessive Moisture or Dryness
If your bread is consistently too dry or too moist, you may need to re-evaluate your bread storage containers. A container that is too airtight can trap moisture, leading to a soft, gummy crust or premature mold. Conversely, a container that allows too much airflow will cause your loaf to dry out and turn stale within hours.
I recommend testing different bread storage containers to see what works best for your specific climate. If you live in a humid area, a breathable paper bag or a wooden box with vents is often superior to plastic. If your home is very dry, a slightly more enclosed environment will help retain the internal moisture of the crumb.
| Issue | Primary Cause | Recommended Fix |
|---|---|---|
| Hard/Dry Crust | Excessive airflow | Use a sealed container |
| Soft/Gummy Crust | Trapped humidity | Use a paper bag |
| Visible Mold | Contamination | Discard immediately |
| Stale Texture | Starch retrogradation | Refresh in the oven |
Conclusion
Mastering the art of baking is only half the journey. Your dedication to the craft deserves a finish that keeps every slice as delicious as the first.
Proper storage serves as the final, vital step in your baking process. By applying these techniques, you ensure your hard work remains fresh for days. You will find that preserving homemade bread becomes second nature as you gain experience in your own kitchen.
Every environment presents unique challenges for your loaves. I encourage you to observe how your specific climate affects your results. Adjust your methods based on the humidity and temperature of your home to achieve the best outcome.
Consistent practice turns these storage habits into a reliable routine. You now possess the knowledge required for preserving homemade bread with confidence. Enjoy the process of sharing your fresh, high-quality creations with friends and family.