Traditional Pumpernickel Bread Recipe: Step-by-Step Guide for Beginners
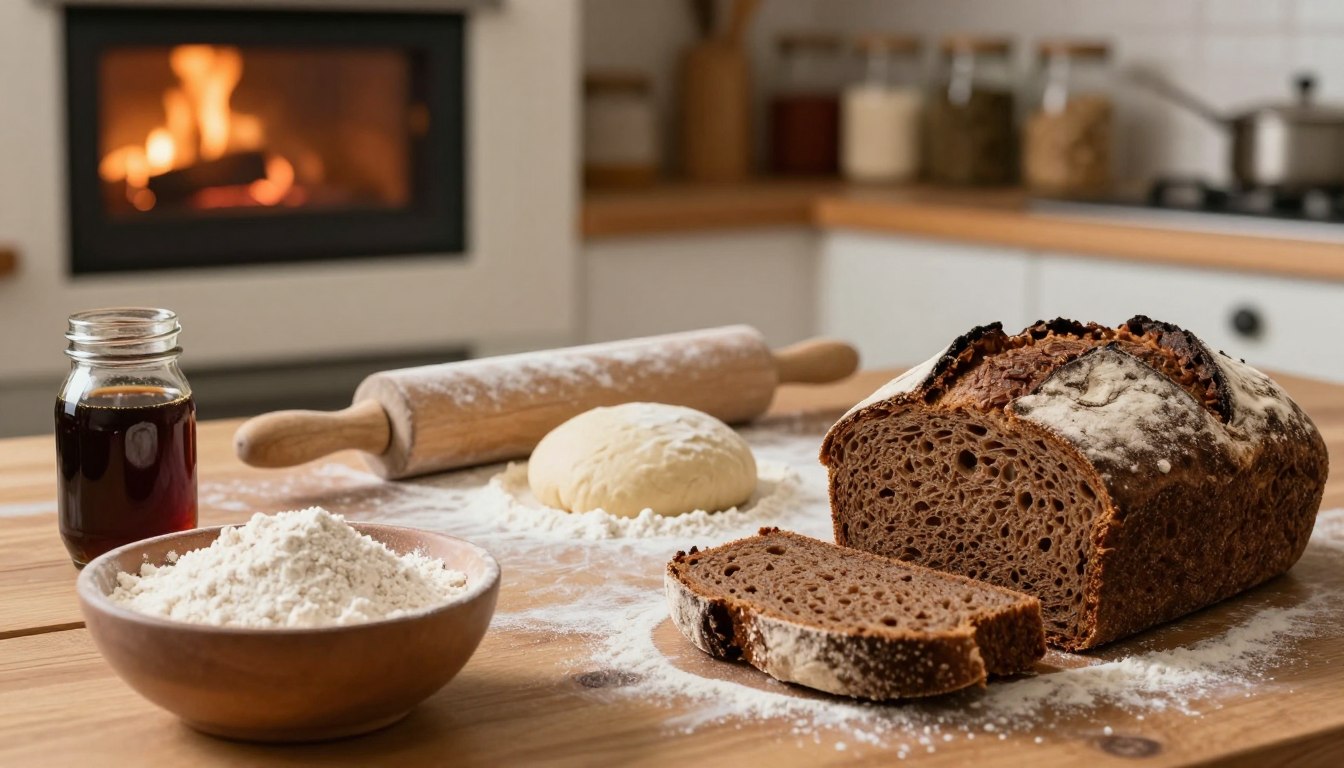
There is something deeply comforting about the aroma of fresh hearth-baked goods filling your home. I remember watching my grandmother work with heavy rye flour, her hands moving with a rhythm that felt like magic. That memory inspired me to master this traditional pumpernickel bread recipe, and I want to help you do the same.
Thank you for reading this post, don't forget to subscribe!Baking with rye requires a bit of patience, but the results are truly rewarding. You will learn how to handle the unique texture of this dense, dark loaf while gaining confidence in your kitchen skills. My goal is to demystify the process so you can create a professional-quality treat that rivals any European bakery.
Whether you are a novice or a seasoned home cook, this guide breaks down every step into manageable parts. Let’s embark on this delicious journey together and bring the authentic taste of hearty, wholesome grains to your table.
Table of Contents
The History and Soul of Authentic Pumpernickel Bread
When I first encountered the deep, earthy aroma of traditional rye bread, I knew there was a rich history waiting to be uncovered. This bread is far more than just a simple food item; it is a testament to human ingenuity and the resourcefulness of past generations. By exploring the roots of authentic pumpernickel bread, we can better appreciate the patience required to create such a masterpiece.
Understanding the German Heritage
The story of this iconic loaf begins in the Westphalia region of Germany. It served as a vital source of sustenance for peasants who often lacked access to sophisticated milling equipment. Because they could not refine their grains into fine white flour, they relied on the whole rye grain available to them.
This necessity birthed a tradition that has survived for centuries. German pumpernickel bread was traditionally baked in large, sealed containers for long periods at low temperatures. This slow process transformed the humble rye into a dark, sweet, and incredibly dense loaf that could last for weeks.
What Makes Pumpernickel Different from Standard Rye
Many people confuse standard rye bread with the real deal, but the differences are significant. Most commercial rye loaves found in grocery stores include wheat flour to provide elasticity and a lighter crumb. In contrast, authentic pumpernickel bread relies entirely on the unique properties of rye.
True German pumpernickel bread contains no milled flour at all. Instead, it is crafted using a combination of whole rye berries and cracked rye. This specific grain composition creates a texture that is dense, moist, and deeply flavorful, setting it apart from any other bread you might find on your table.
Essential Ingredients for Your Traditional Pumpernickel Bread Recipe
Building a traditional pumpernickel bread recipe starts with selecting the finest ingredients available. I have found that the quality of your flour and leavening agent dictates the final texture and depth of flavor in your loaf.
Sourcing High-Quality Rye Flour
Rye flour is the heart of this bread. Unlike wheat, which contains about 4% natural sugar, rye boasts 7% natural fruit sugar. This higher sugar content is vital because it caramelizes during the long baking process, creating that signature sweet aroma and earthy taste.
When shopping, look for stone-ground dark rye flour to ensure you get the full nutritional profile of the grain. Using fresh, high-quality flour makes a noticeable difference in the crumb structure of your bread.
The Role of Molasses and Cocoa Powder
Many home bakers often wonder why some recipes call for dark additives. While traditional methods rely on a very long, low-temperature bake to achieve a deep brown color, modern versions often use specific ingredients to mimic this look.
- Molasses: Adds a rich, bittersweet depth that complements the rye.
- Cocoa Powder: Provides a dark, mahogany hue without overpowering the bread’s natural flavor.
- Coffee: Sometimes used as a liquid substitute to enhance the roasted notes.
I recommend using these sparingly. You want to enhance the natural profile of the grain rather than mask it with heavy sweeteners.
Selecting the Right Yeast or Sourdough Culture
Choosing your leavening agent is a personal decision that impacts the final character of your traditional pumpernickel bread recipe. You generally have two main paths to follow:
A sourdough culture is the traditional choice. It provides a complex, tangy flavor profile and helps break down the starches in the rye for better digestion. If you prefer a faster bake, commercial yeast is a reliable alternative, though it may lack the depth of a long-fermented sourdough loaf.
Regardless of your choice, ensure your culture is active and bubbly before mixing. A strong start is the best way to guarantee a successful bake every single time.
Must-Have Kitchen Tools for Dark Rye Baking
When I started my journey into dark rye baking, I quickly learned that my standard kitchen gear was not enough. Working with rye dough is a unique experience because it is much heavier and stickier than traditional wheat dough. To create homemade pumpernickel bread that rivals your favorite bakery, you need to invest in a few specific items that make the process manageable and successful.
Choosing the Right Loaf Pan
The most important tool in my kitchen for this specific type of bread is a Pullman pan. This is a specialized loaf tin that comes with a sliding lid. By keeping the loaf entirely contained during the long bake, the pan helps retain essential moisture that would otherwise evaporate.
This controlled environment is vital for achieving that signature dense, dark crumb. Without the lid, the edges of your bread might dry out too quickly before the center is fully cooked. Using this pan ensures your homemade pumpernickel bread maintains its integrity from the first slice to the last.
Precision Measuring with Digital Scales
Because rye dough can be quite dense, I consider precision measuring with digital scales to be non-negotiable. Relying on volume measurements like cups can lead to inconsistent results, as flour density varies significantly. A high-quality digital scale allows me to measure my ingredients to the exact gram every single time.
Consistency is the secret to mastering complex recipes. When you use a scale, you eliminate the guesswork that often leads to heavy or gummy loaves. I highly recommend keeping your scale clean and calibrated to ensure your baking remains perfectly consistent throughout your journey.
Preparing Your Sourdough Starter for Success
A successful loaf of german pumpernickel bread begins long before the oven is turned on. Because this type of bread is incredibly dense and heavy, it requires a very strong, active culture to provide the necessary lift. I find that using a dedicated rye-based starter creates the best results for this specific style of baking.
Feeding Your Starter for Maximum Activity
To ensure your starter has the strength to leaven a heavy dough, you must feed it consistently with high-quality rye flour. I recommend a feeding ratio of 1:2:2, which means one part starter, two parts water, and two parts rye flour. This robust feeding schedule encourages the wild yeast to multiply rapidly.
Consistency is the secret to a healthy culture. By keeping your starter at a stable room temperature, you help it reach its peak activity level much faster. When you prepare your german pumpernickel bread, always feed your starter at least four to six hours before you plan to mix your final dough.
Signs Your Starter is Ready for Baking
Learning to read your starter is a skill that improves with practice. You want to catch the culture when it is at its absolute peak, just before it begins to collapse. Look for these specific indicators to know if your starter is ready for your german pumpernickel bread:
- Volume: The starter should have doubled or even tripled in size within the jar.
- Texture: You should see plenty of bubbles throughout the mixture, indicating active fermentation.
- Aroma: A healthy, ready-to-use starter will smell pleasantly tangy, fruity, or slightly acidic.
- Surface: The top should look domed or slightly rounded, showing that the yeast is still pushing upward.
If you are ever in doubt, you can perform a simple float test by dropping a small spoonful of the starter into a glass of water. If it floats, it is filled with enough gas to leaven your heavy rye dough effectively. Patience during this preparation phase is the best way to avoid a dense or gummy final product.
Mixing the Dough: Achieving the Right Consistency
Getting the consistency of your dough right is the most important step in any successful dark rye bread recipe. Because rye flour lacks the strong glutenin found in wheat, the dough will feel much denser and stickier than what you might be used to. I find that mastering this stage is the secret to professional-looking results.
Combining Dry and Wet Ingredients
When you start mixing, add your wet ingredients to the dry components slowly. You want to incorporate everything until the mixture forms a cohesive mass. The dough should not be overly wet; instead, it should stick together well and peel off the side of the bowl easily.
If the mixture feels too dry, add a tiny splash of water at a time. If it is too wet, add a dusting of flour. Finding this balance is essential for any dark bread recipe you attempt in the future.
Techniques for Handling Sticky Rye Dough
Working with rye requires a different approach than standard bread baking. Since the dough is naturally tacky, avoid the temptation to add too much extra flour, as this can make your final loaf heavy. Instead, keep your hands slightly damp or lightly oiled to prevent sticking.
Use a sturdy dough scraper to help you fold and shape the mixture. This tool is your best friend when managing the unique texture of a dark bread recipe. With a little practice, you will learn to handle the dough with confidence, ensuring your dark rye bread recipe turns out perfectly every time.
The Importance of the Long Fermentation Process
When I bake a classic pumpernickel bread, I quickly learn that patience is the most vital ingredient. This slow method is not just about waiting; it is a scientific process that breaks down complex starches in the rye flour. By allowing the dough to rest, I ensure the final loaf is much easier to digest and possesses a deep, earthy flavor profile.
Creating the Ideal Environment for Proofing
To achieve the best results, I always focus on maintaining a consistent temperature for my dough. Rye flour is sensitive to its surroundings, so I prefer to keep my kitchen between 70°F and 75°F during the initial stages. Consistency is key when you want to avoid uneven fermentation or a collapsed structure.
I often use a proofing box or a warm corner of my kitchen to keep the dough stable. If the environment is too cold, the yeast activity slows down significantly, which can lead to a dense and gummy loaf. Keeping the area draft-free helps the classic pumpernickel bread rise steadily over the required hours.
Why Time is the Secret Ingredient
Time acts as a catalyst for the unique chemical reactions that define this style of baking. While many modern recipes rush the process, a true classic pumpernickel bread requires a very long baking period of about 14 hours at a low temperature of 120°C. This extended heat exposure allows the sugars to caramelize slowly, creating that signature dark color and rich, sweet-savory taste.
The following table outlines how the fermentation and baking stages contribute to the final quality of your loaf:
| Stage | Duration | Primary Benefit |
|---|---|---|
| Initial Fermentation | 4-6 Hours | Flavor development |
| Final Proofing | 2-3 Hours | Structural integrity |
| Low-Temp Baking | 14 Hours | Caramelization and texture |
Shaping and Proofing Your Hearty Loaf
I find that the most rewarding part of baking is shaping the dough into its final form. After the long fermentation process, your dough is full of life and delicate gas bubbles. This stage of my hearty bread recipe requires a calm approach to ensure the final structure remains light and airy.
Gentle Handling Techniques
When you move the dough from your mixing bowl to the work surface, avoid aggressive kneading. You want to preserve the precious air pockets that the yeast worked so hard to create. Use a bench scraper to gently fold the dough over itself, creating tension on the outer surface.
If the dough feels sticky, lightly dust your hands with a bit of rye flour. Keep your movements fluid and steady rather than forceful. Treating the dough with care at this stage prevents the loaf from becoming dense or flat during the bake.
Final Proofing Tips for Beginners
Once you have shaped your dough, it is time to place it into your prepared baking tins. I always recommend filling the tins only half full. This simple rule provides the necessary space for the dough to expand during the final proofing stage without overflowing.
Place your tins in a draft-free area to allow the dough to rise slowly. Patience is your best friend here, as rushing the proof will compromise the texture of your hearty bread recipe. Once the dough has risen to just below the rim of the tin, it is ready for the oven.
The Low and Slow Baking Technique
The secret to a professional-grade loaf lies in the patience of a long, low-temperature bake. This method is the foundation of any authentic dark rye bread recipe, as it allows the sugars in the grain to caramelize slowly. This chemical transformation, known as the Maillard reaction, creates the signature deep color and rich, complex flavor profile that defines this classic bread.
Setting the Oven Temperature
To achieve the best results, you must resist the urge to rush the process with high heat. I recommend setting your oven to a very low temperature, typically between 200°F and 250°F. This gentle heat ensures the center of the dense loaf cooks through completely without scorching the exterior crust.
Because this process can take up to 14 hours, consistency is your best friend. Monitoring your oven temperature with an external thermometer is a smart way to ensure your bread stays in the ideal heat zone for the entire duration. This steady environment is what separates a standard loaf from a truly traditional masterpiece.
Using Steam to Achieve a Perfect Crust
Maintaining moisture is just as important as controlling the heat when you follow a dark bread recipe. If the oven is too dry, the exterior will dehydrate and become tough before the inside is finished. I have found that wrapping your baking tin in two layers of heavy-duty tin foil is the most effective way to trap steam.
This simple barrier prevents moisture from escaping, effectively steaming the bread within its own container. By keeping the environment humid, you ensure the crumb remains perfectly moist and tender. This technique is essential for anyone aiming to replicate the authentic texture of traditional pumpernickel at home.
Cooling and Curing: Why Patience Matters
The journey of crafting a loaf does not conclude the moment you pull it from the oven. While the aroma of classic pumpernickel bread filling your kitchen is intoxicating, the final stage of the process is essential for success. You must resist the urge to cut into the loaf while it is still steaming hot.
The Science of Resting the Loaf
When you remove your bread from the oven, the internal temperature is still very high. The moisture inside the loaf is unevenly distributed, and the starches are still in a delicate, gelatinous state. Resting allows this moisture to migrate throughout the crumb, ensuring an even texture from the center to the crust.
If you slice too early, you interrupt this vital stabilization process. The steam escapes prematurely, which can cause the bread to dry out or become unpleasantly sticky. Proper cooling ensures that your classic pumpernickel bread achieves the dense, hearty structure it is famous for.
Why You Should Wait 24 Hours Before Slicing
I cannot stress enough why you should wait 24 hours before slicing into your loaf. This curing period is the secret to transforming a good loaf into a professional-grade masterpiece. During these hours, the flavors deepen and the crumb sets firmly, preventing a gummy interior.
Skipping this step often leads to a texture that feels raw or doughy, even if the bread is fully baked. By giving your bread the time it needs to mature, you ensure that every slice is perfect. Use the following guide to understand how time impacts your final result.
| Resting Time | Crumb Texture | Flavor Profile |
|---|---|---|
| 1 Hour | Very soft and gummy | Underdeveloped |
| 12 Hours | Improving, slightly sticky | Developing depth |
| 24 Hours | Firm, perfect slice | Rich and complex |
Troubleshooting Common Issues with Homemade Pumpernickel Bread
Even the most seasoned bakers occasionally face hurdles when mastering the art of rye. It is completely normal to encounter a few bumps in the road while perfecting your technique. I have compiled these solutions to help you navigate the most common challenges you might face in your kitchen.
Fixing a Dense or Gummy Texture
If your loaf feels heavy or sticky inside, the culprit is often the high level of pentosans found in rye flour. These natural gums absorb significant moisture, which can lead to a gummy crumb if the bread is sliced too soon. To ensure your traditional pumpernickel bread recipe succeeds, you must allow the loaf to cure fully.
- Wait at least 24 hours before slicing to allow moisture to redistribute.
- Ensure your oven temperature is accurate to prevent a raw, gummy center.
- Check that your sourdough starter is active and bubbly before mixing.
Adjusting for Humidity and Altitude
Environmental factors play a massive role in how your dough behaves. High humidity can make your dough feel overly sticky, while high altitudes often cause bread to rise too quickly and then collapse. I recommend keeping a small journal to track how your old-fashioned pumpernickel bread reacts to your local climate.
If you live in a humid area, consider reducing the water content by a tablespoon or two. At higher altitudes, you might need to slightly decrease your yeast or sourdough starter amount to slow down the fermentation process. Consistency is key when you are learning to adapt to your specific environment.
Correcting Under-Baked Centers
There is nothing more frustrating than cutting into a loaf only to find the middle is still soft. This usually happens when the oven temperature drops or the loaf is removed too early. You can easily avoid this by using a digital thermometer to check the internal temperature of your bread.
Your loaf is typically done when the center reaches about 200°F. If you find your crust is getting too dark before the center is ready, try tenting the top with a piece of aluminum foil. Patience is your best tool for achieving that perfect, hearty texture every single time.
Creative Ways to Serve and Store Your Dark Bread
Mastering the art of baking is only half the journey; knowing how to serve and store your creation is equally important. Whether you have crafted a dense, traditional loaf or a lighter version, the deep, earthy notes of your homemade pumpernickel bread deserve the perfect accompaniments to truly shine on your table.
Classic Toppings and Pairings
I find that the robust flavor profile of this bread pairs beautifully with both savory and sweet ingredients. You can create a sophisticated snack by layering thin slices with high-quality toppings that balance the rye’s natural intensity.
Consider these delightful combinations for your next gathering:
- Smoked fish like salmon or trout with a dollop of fresh cream cheese.
- A thin layer of salted butter topped with sharp, aged cheddar cheese.
- Sweet fruit preserves or tart lingonberry jam for a classic European breakfast.
If you have leftovers, do not let them go to waste. You can slice your old-fashioned pumpernickel bread thinly, brush the pieces with melted butter, and bake them until they are perfectly crisp. These homemade crackers make an impressive addition to any cheese board.
Best Practices for Long-Term Storage
Proper storage is the secret to maintaining the moisture and texture of your bread for as long as possible. For short-term use, I suggest keeping your loaf well-wrapped in a clean kitchen towel or a paper bag at room temperature. This method helps the crust stay slightly crisp while keeping the interior soft for a few days.
If you want to enjoy your homemade pumpernickel bread over a longer period, freezing is your best option. Simply slice the loaf before freezing so you can pull out individual portions whenever a craving strikes.
When you are ready to eat, you can toast the frozen slices directly or let them thaw at room temperature. Following these simple steps ensures that your old-fashioned pumpernickel bread remains as delicious as the day it came out of the oven.
Conclusion
Baking your own loaf is a rewarding journey that connects you to centuries of tradition. You now possess the skills to create an authentic pumpernickel bread that brings deep flavor and nutrition to your table.
I hope this hearty bread recipe becomes a staple in your kitchen. It offers a perfect way to enjoy wholesome breakfasts or savory snacks throughout the week.
Practice remains the most important part of your success. Each loaf you pull from the oven brings you closer to perfection. Share your results with friends or keep a fresh loaf ready for your next meal.
Your kitchen is now a place where history meets modern craft. Enjoy the process of creating something truly special with your own hands.